 I spent a lot of preparing tools for my cabinet maker exam.
Indeed, most of my tools where found in flea markets, then refurbished and sharpened.

Woodworking tools
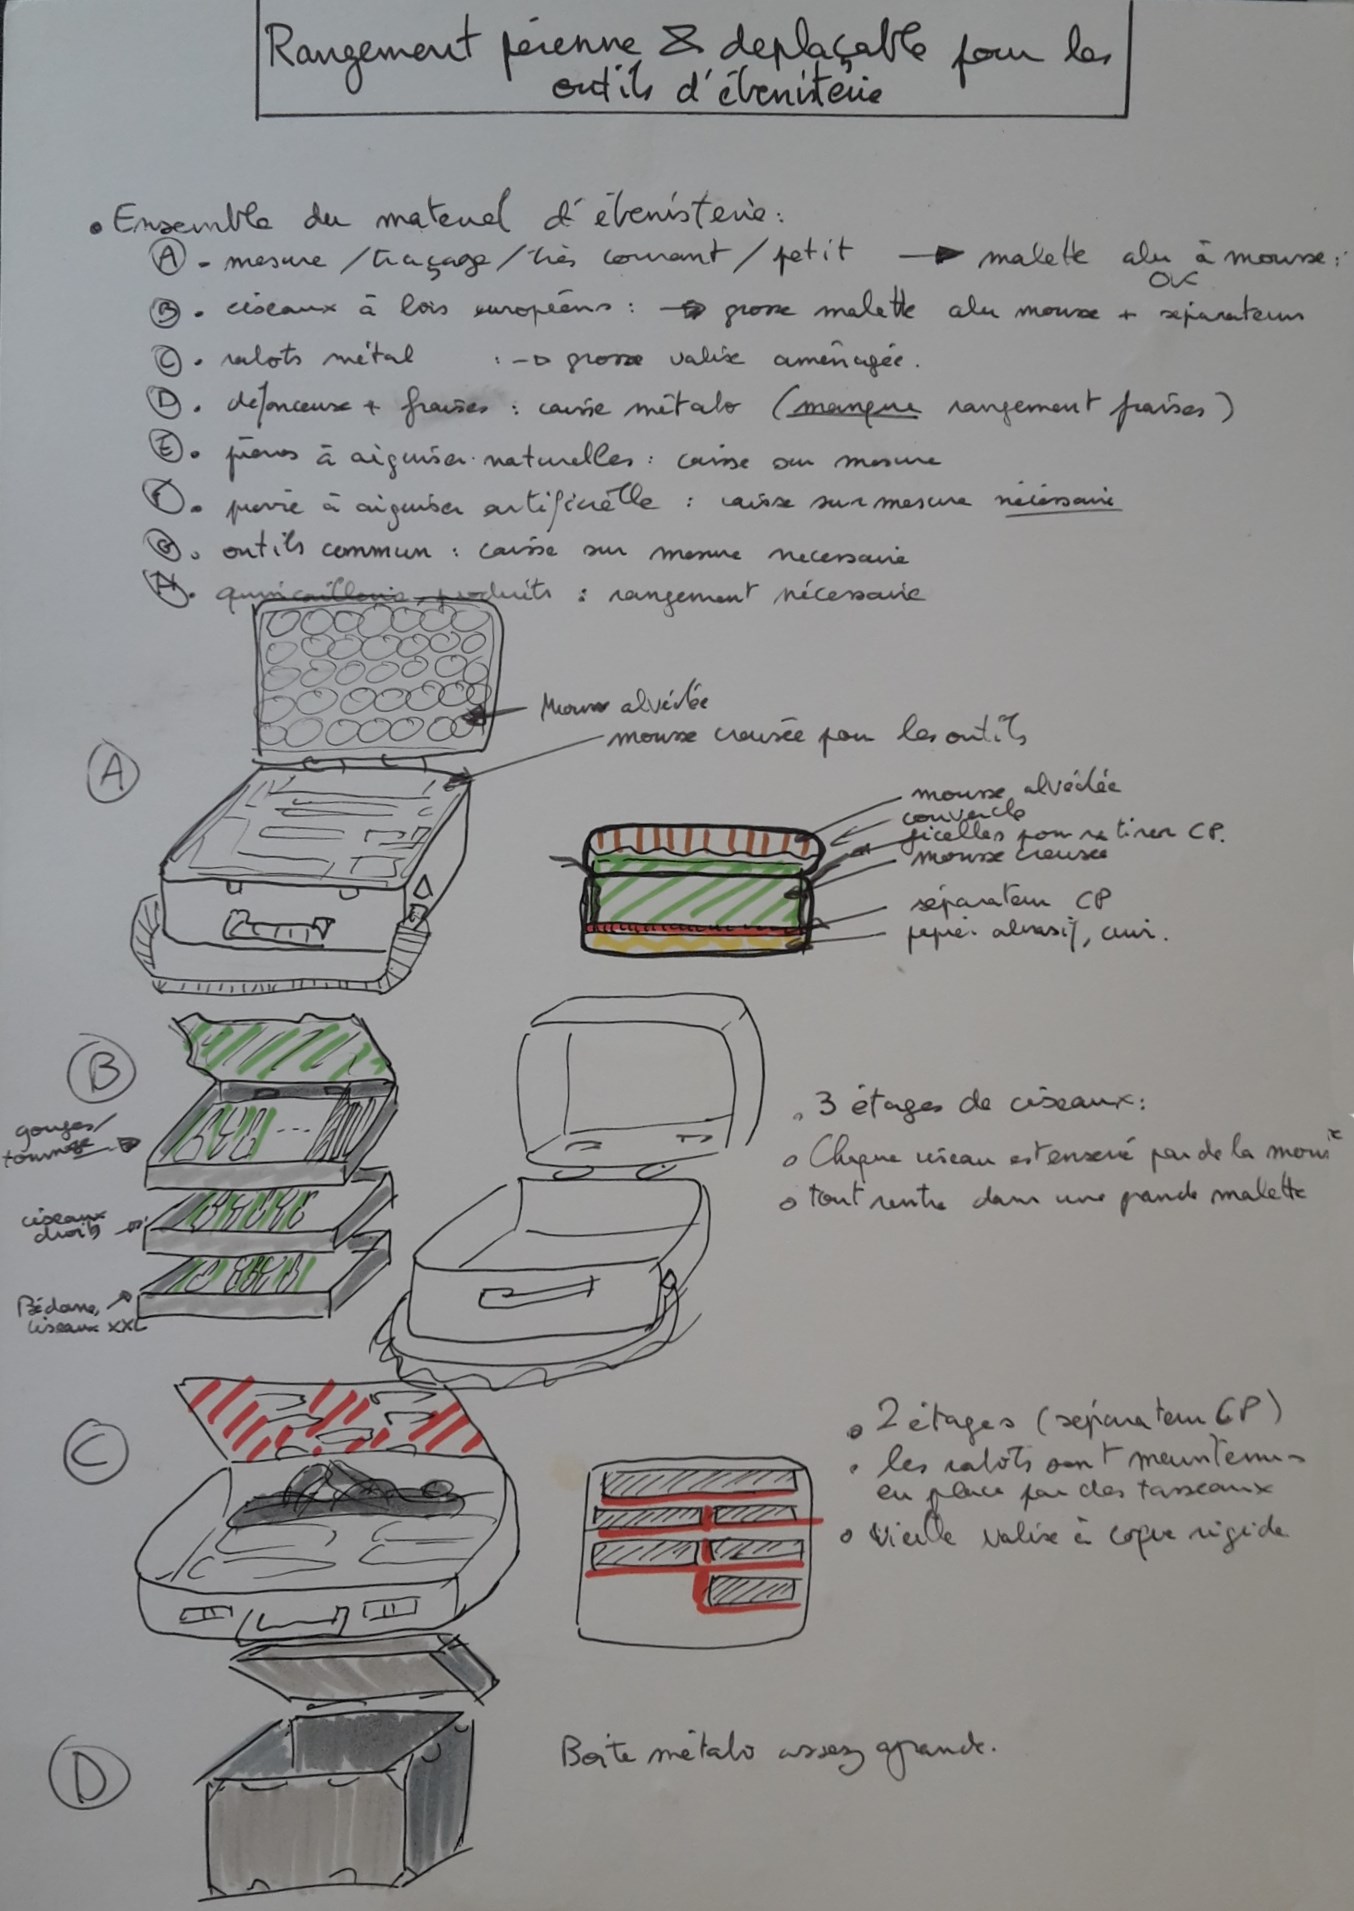
As a general principle, I tend to loose stuff, so I took that into account when deciding what tools to take and how to store it.
I don’t have toolboxes where tools are free to move (dulling their sharpening), and where it’s easy to lose something. Instead, each tool has its place and is protected (usually foam).
Because I used several workshops, my tools are split into thematic storage so they can be transportable and I can adapt what toolbox to take.
Marking equipment / essential
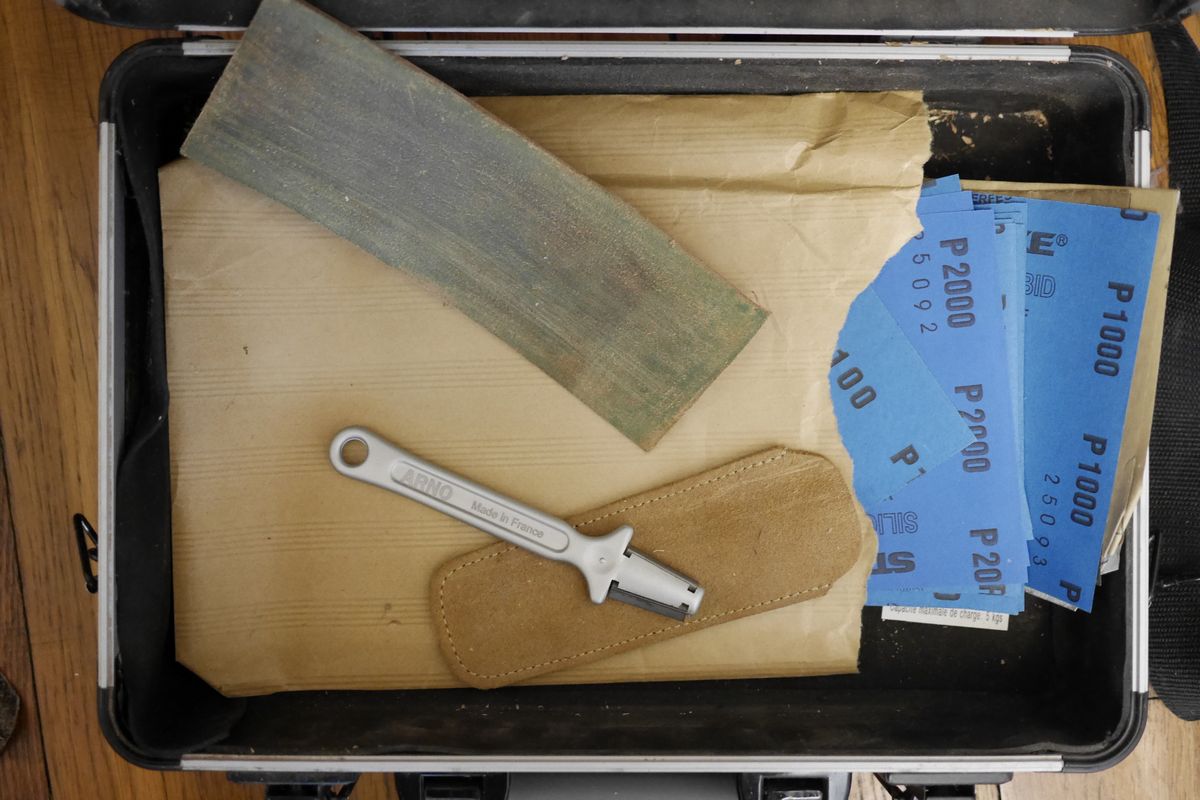
The first cabinet maker tools beside the workbench are the marking / drawing tools in my opinion. Therefore, I came with the idea to use a rugged case full of foam. The foam is cut in layers so each tool has a very specific place, and I can see immediately if I forgot something.
The tools are selected by how often I use them and their genericity.
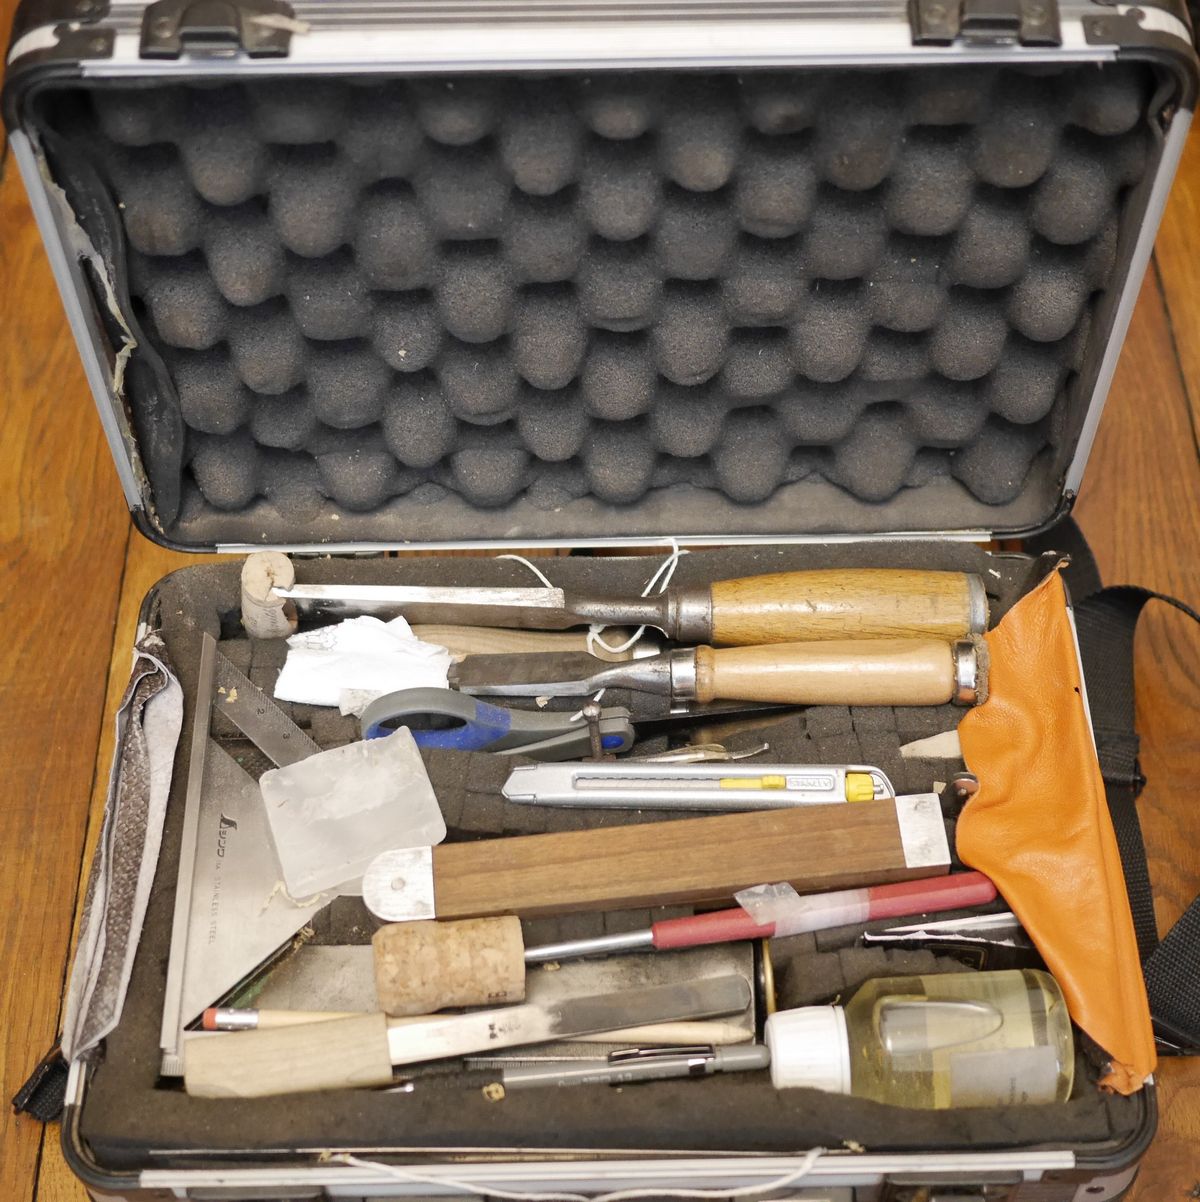
The foam sits on top of a wood plank. When removing it, I access flat stuff that I don’t use too often.
Abrasive papers from 100 to 2000 and a leather strop with raw leather and green compound for sharpening.
Scrappers are amazing in my opinion. Both low tech and extremely efficient.
Sadly they are very difficult to sharpen properly with a traditional steel burnisher.
Thankfully, a French company build carbide burnisher, the carbide quickly pushing the steel from the scrapper.
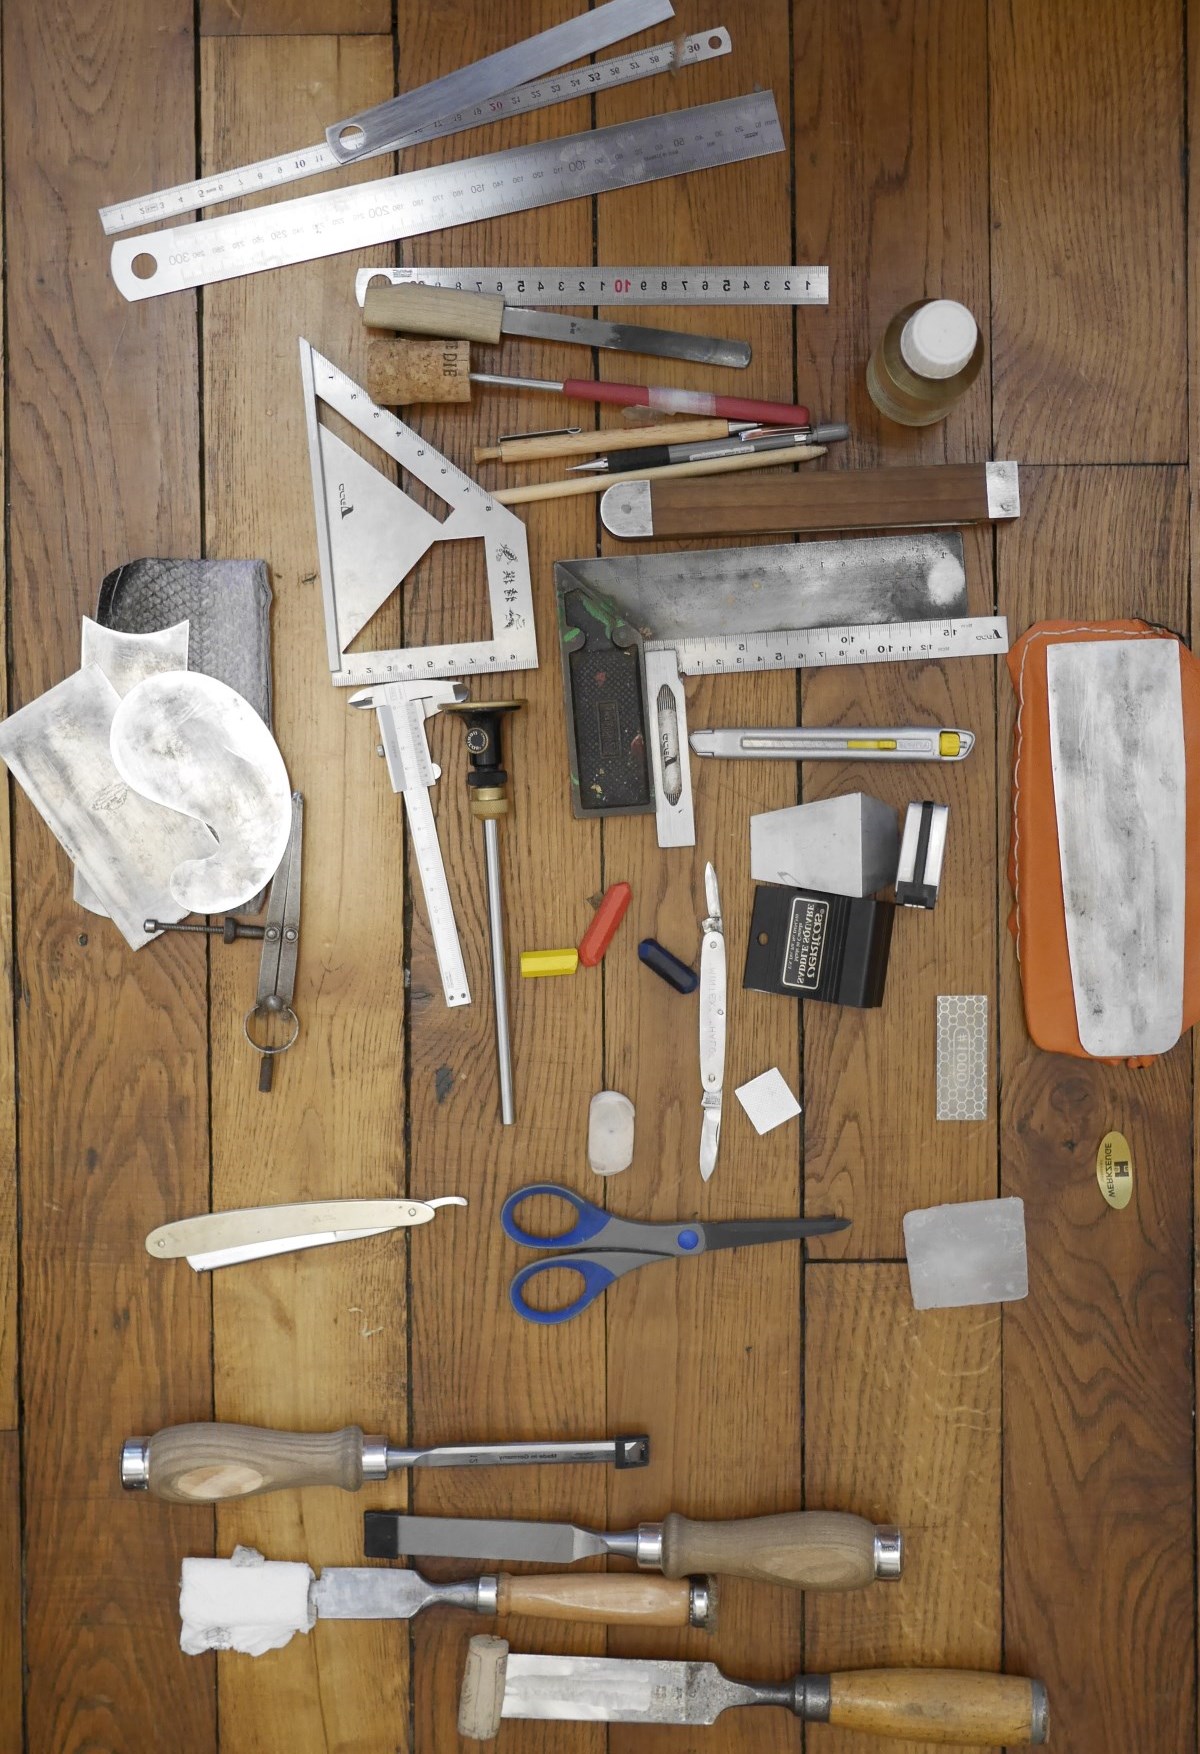
So the first role of the tools in this case is marking and measuring.
measuring
I use steel rules with engraved digits with various size and flexibility, and a measuring tape. Same with the squares. The Japanese square is extremely handy with its 45° angle, same as saddle squares (both straight and for dovetail), and false square (which is not super handy, as it can’t be locked in a position). Last a compass (with blocking and precise adjustment), and a precise caliper.
In my opinion measuring tools should be made of metal, not plastic or wood. I trued myself the rules and squares. Indeed, even decent rulers have machining marks.
marking
Color chalks are useful to mark parts and to avoid mistakes by outlining stuff.
To mark lines, pencils are very common but not precise enough. Drawing knifes sharpened to have only one bevel (in fact the folding knife has 2 blades, each having the bevel one a different side) are necessary to reach the 0.1 mm accuracy range. Alternatively, a pen with a carbide tip is strong enough to mark even hardened steel. The marking gauge is essential, both in measure and markings. It has to be sharpened once in a while. This model has a tendency to roll and untrue itself.
Real handy tools
Camelia oil has been used on Japanese tools for a long time, I really like it after sharpening/contact with water. For instance, when using my ‘emergency’ 1k diamond stone.
Paraffin wax is also useful as a protection and to improve sliding of tools.
Scrappers are true MVP of any toolbox. Inexpensive, flexible, and producing a world class finish in my opinion. Hard to sharpen, so their edges are protected in leather pouches.
Last few wood chisels are always useful.
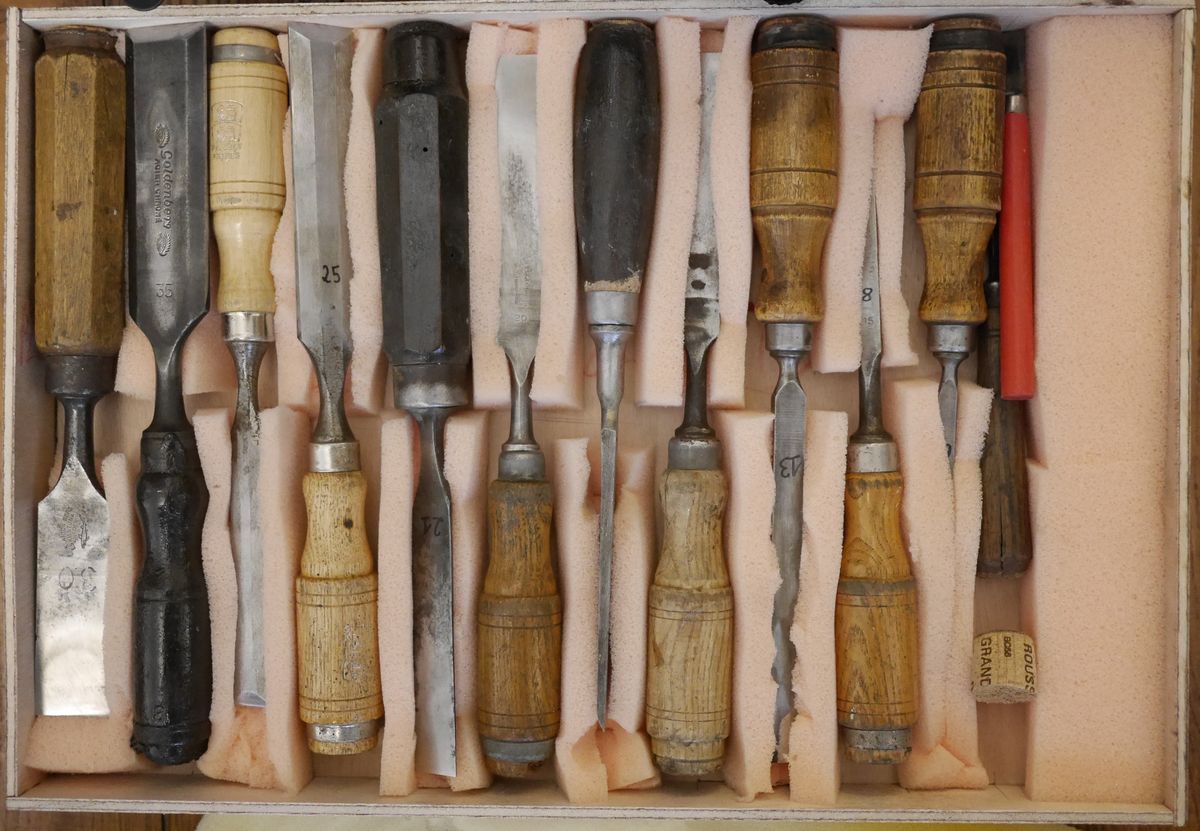
Wood chisels
I use chisel a lot. This is simply due to the fact that using hand tools is faster than using machine when doing small series. Besides, very sharp chisels produce a nice finish, even on hard wood.
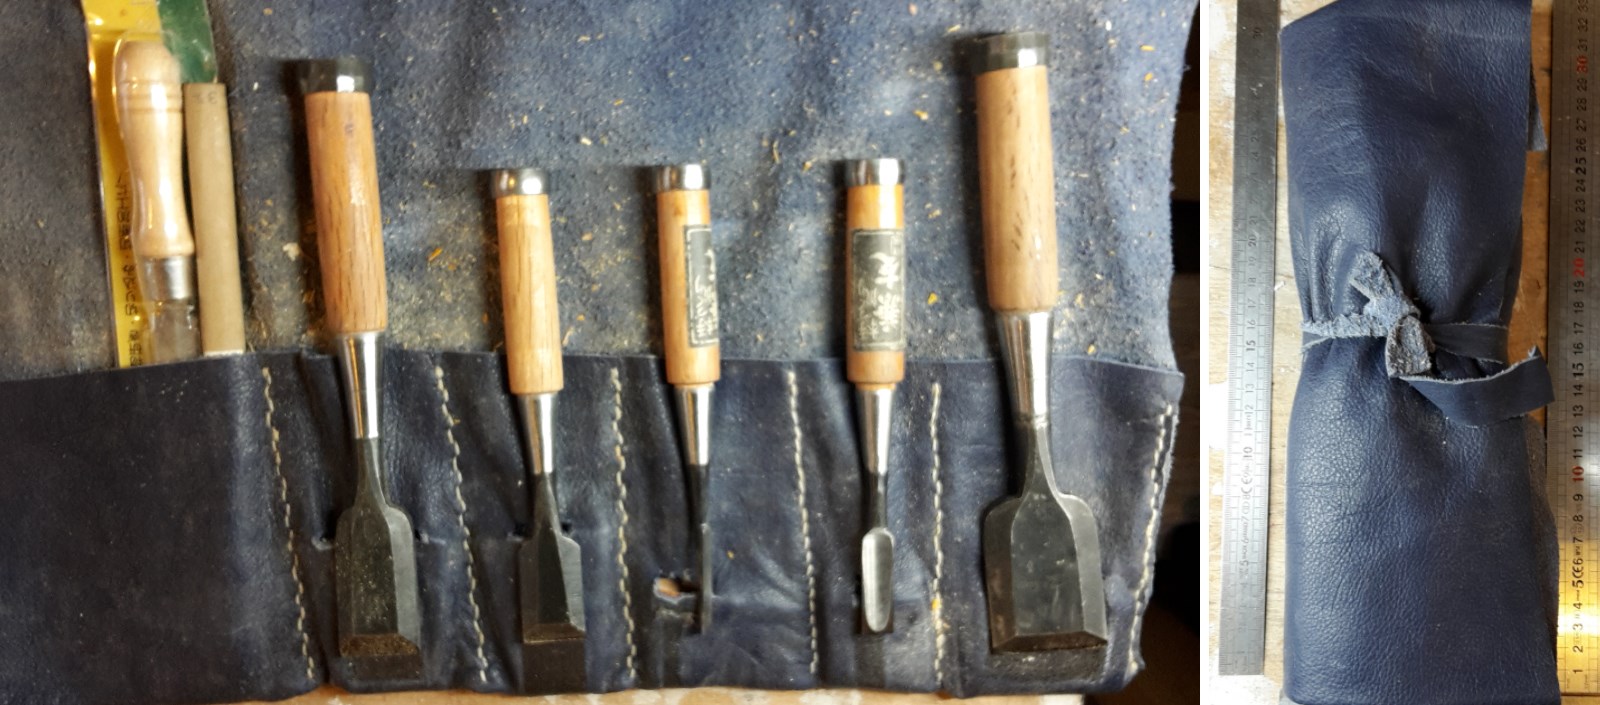
My main chisel set is in a leather pouch that can be rolled. I painstakingly found each chisel in Japan, expanding much energy to find backcountry stores and producers.
Japanese chisels are extremely hard, which require good sharpening, and some care when digging mortises. I chose a rather step bevel angle.
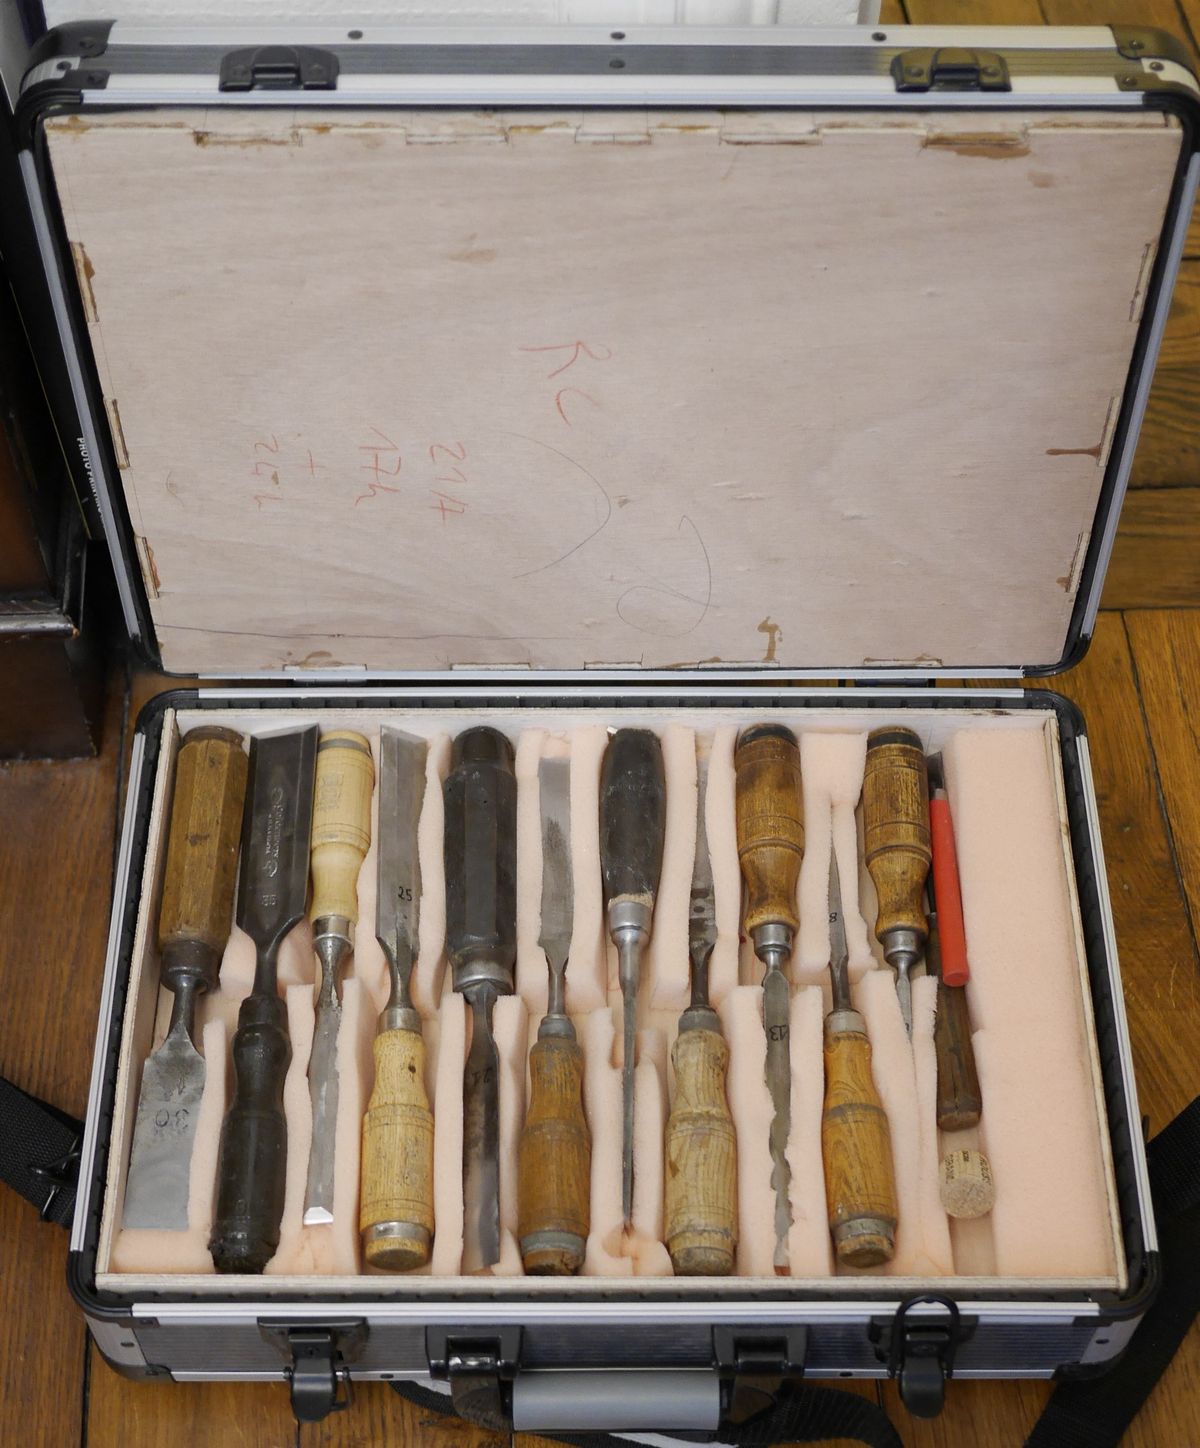
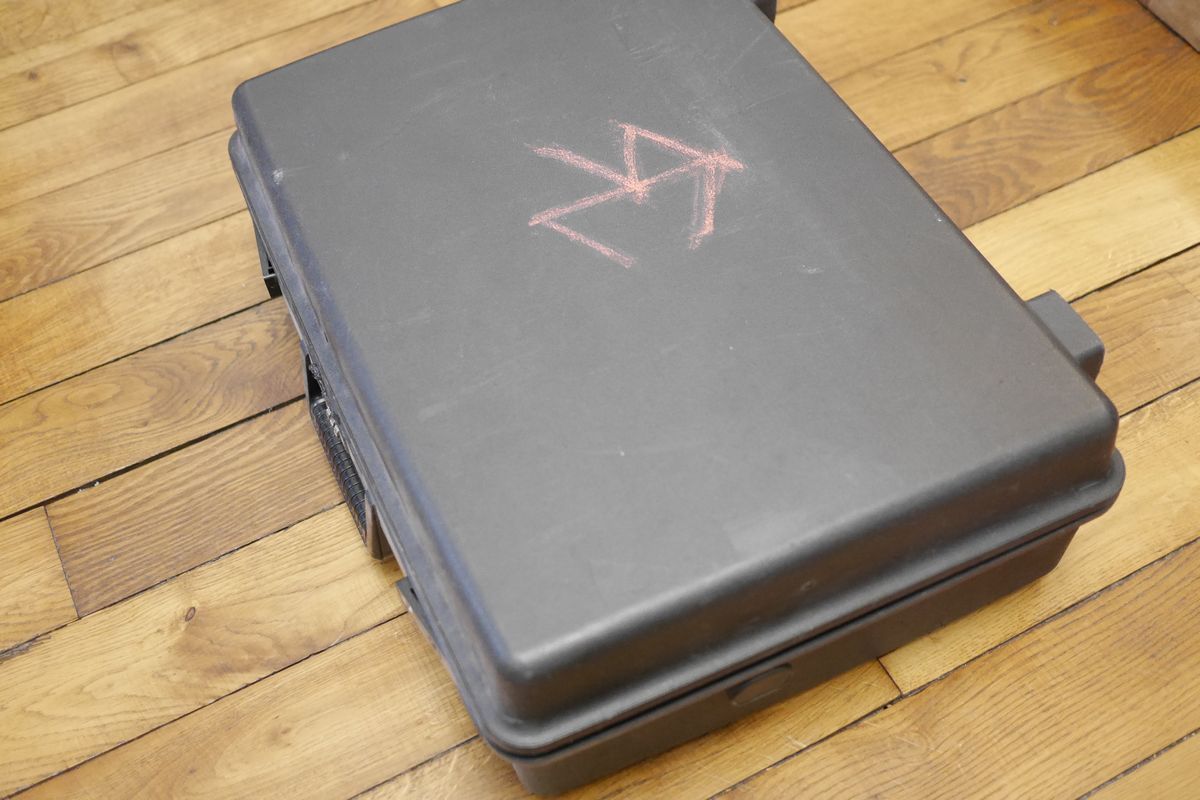
The main storage for chisels is a quite large roughed case. I built 3 wood containers for this case so the different types of chisels are separated. 100% of the chisels are from flea market or hand made. Usually I look for chisel in the early to mid-20th century, and some from end of 19th century. I carefully selected chisels based on the quality of steel (Swedish, Sheffield, and of course mainly French such as Peugeot double lion, Goldenberg double eye, etc. ). Steel from this era tends to be super fine grained (incredible finish), but quite soft, which forces to sharpen often. Sharpening with very hard stone should be avoided. That’s a lot of time spend in refurbishing, but what a finish!
 comment: # (
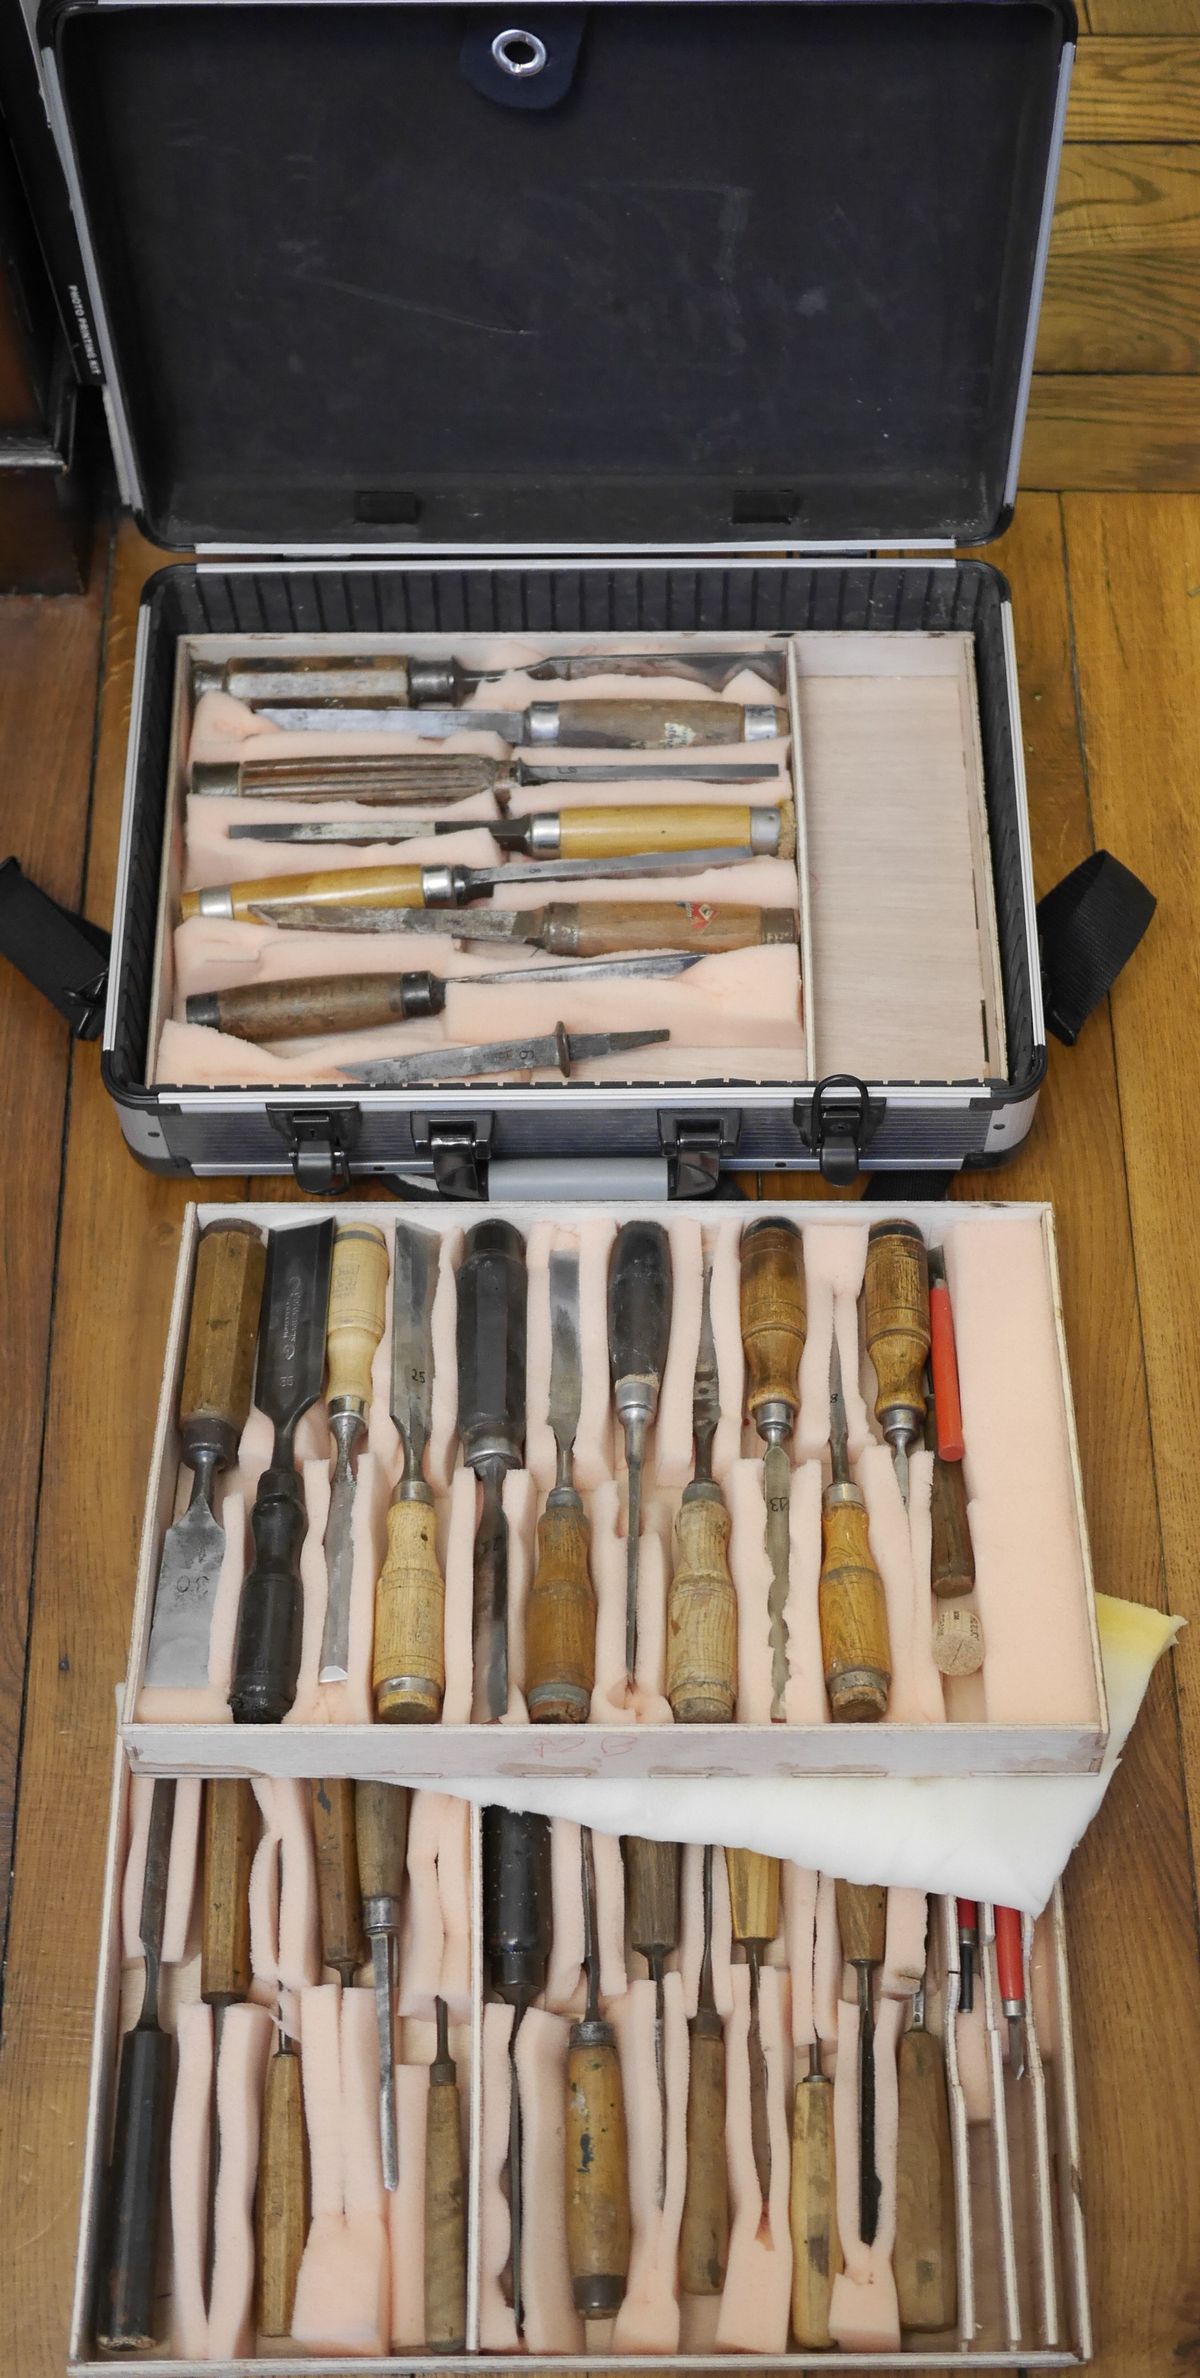 )
)
))
The top level is for gouges and other specialty chisel, such as turning chisel (I made them from old files made of super hard steel).
For the moment I can’t sharpen gouges up to my usual standard due to lack of rounded stones.
This level is protected by an extra layer of foam that comes on top.
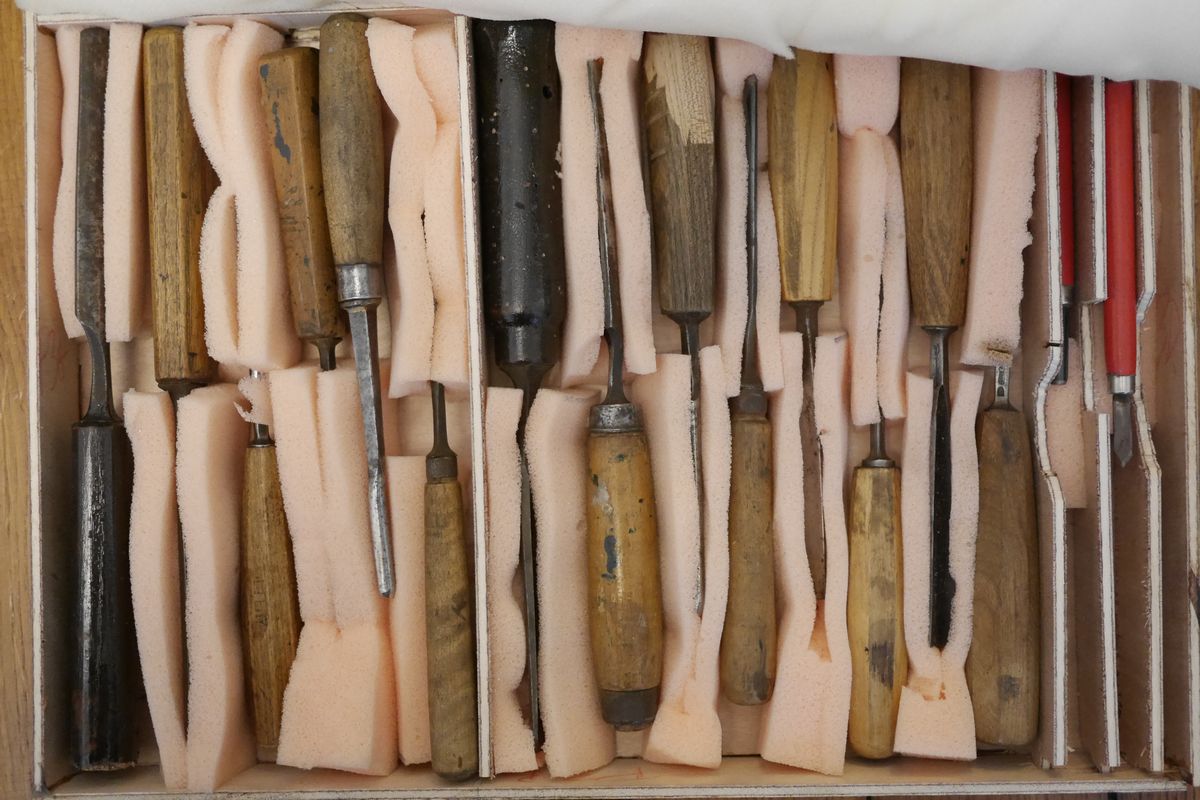
The main level is dedicated to usual chisels from 35 mm to 5 mm.
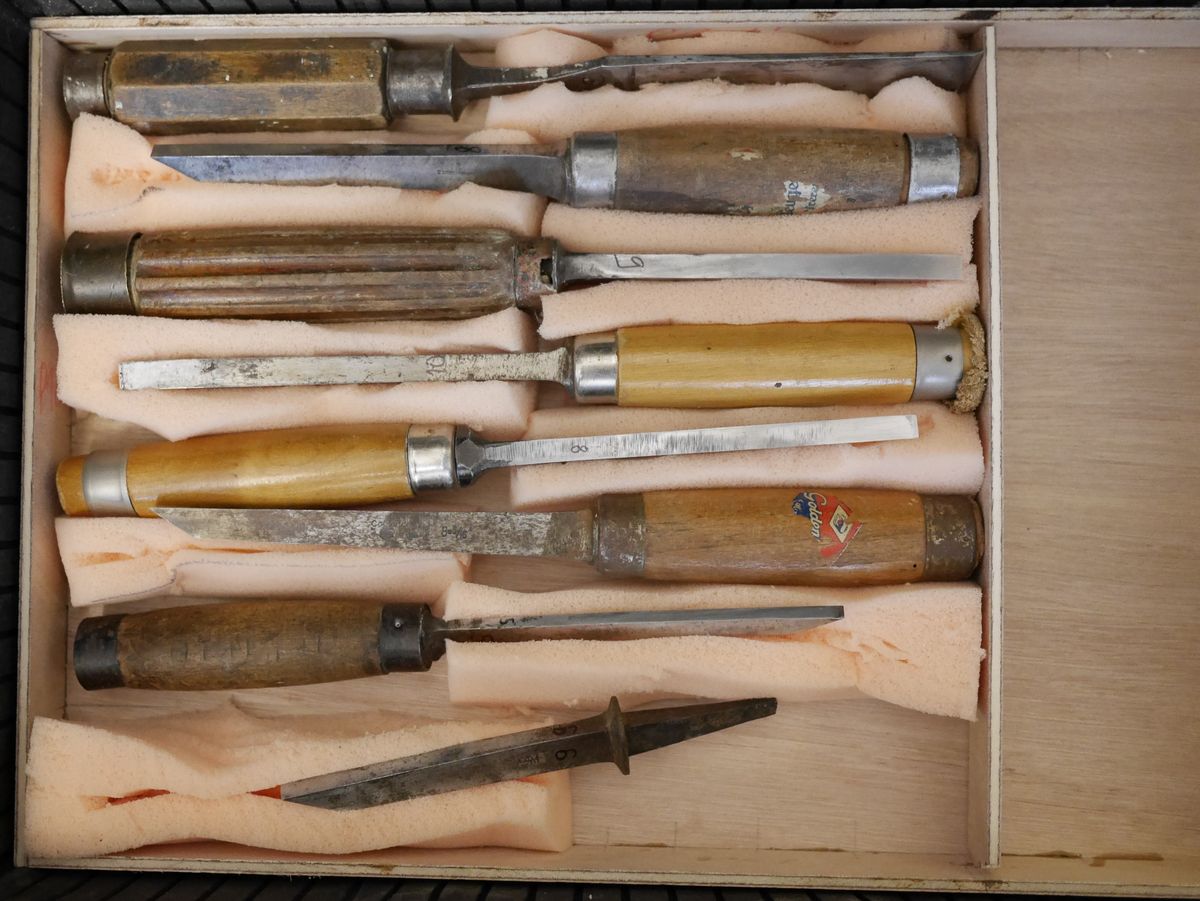
The bottom layer is for very large chisel (>30cm), and super sturdy chisel used to dig mortises, with some extra space for the future.
Hand planes###
Hand planes are the kind of tools that are really specialized, but really hard to bypass when you don’t have one. All of my planes except one come from flea market, with special care on truing/refurbishing/sharpening everything. I also had a project where I converted French blade from late 19th century to be used with metal Stanley plane from mid 20th century.
One of my workshop don’t have a power planner, so I’m used to plane by hand a lot. When removing a lot of wood, this is a true workout.
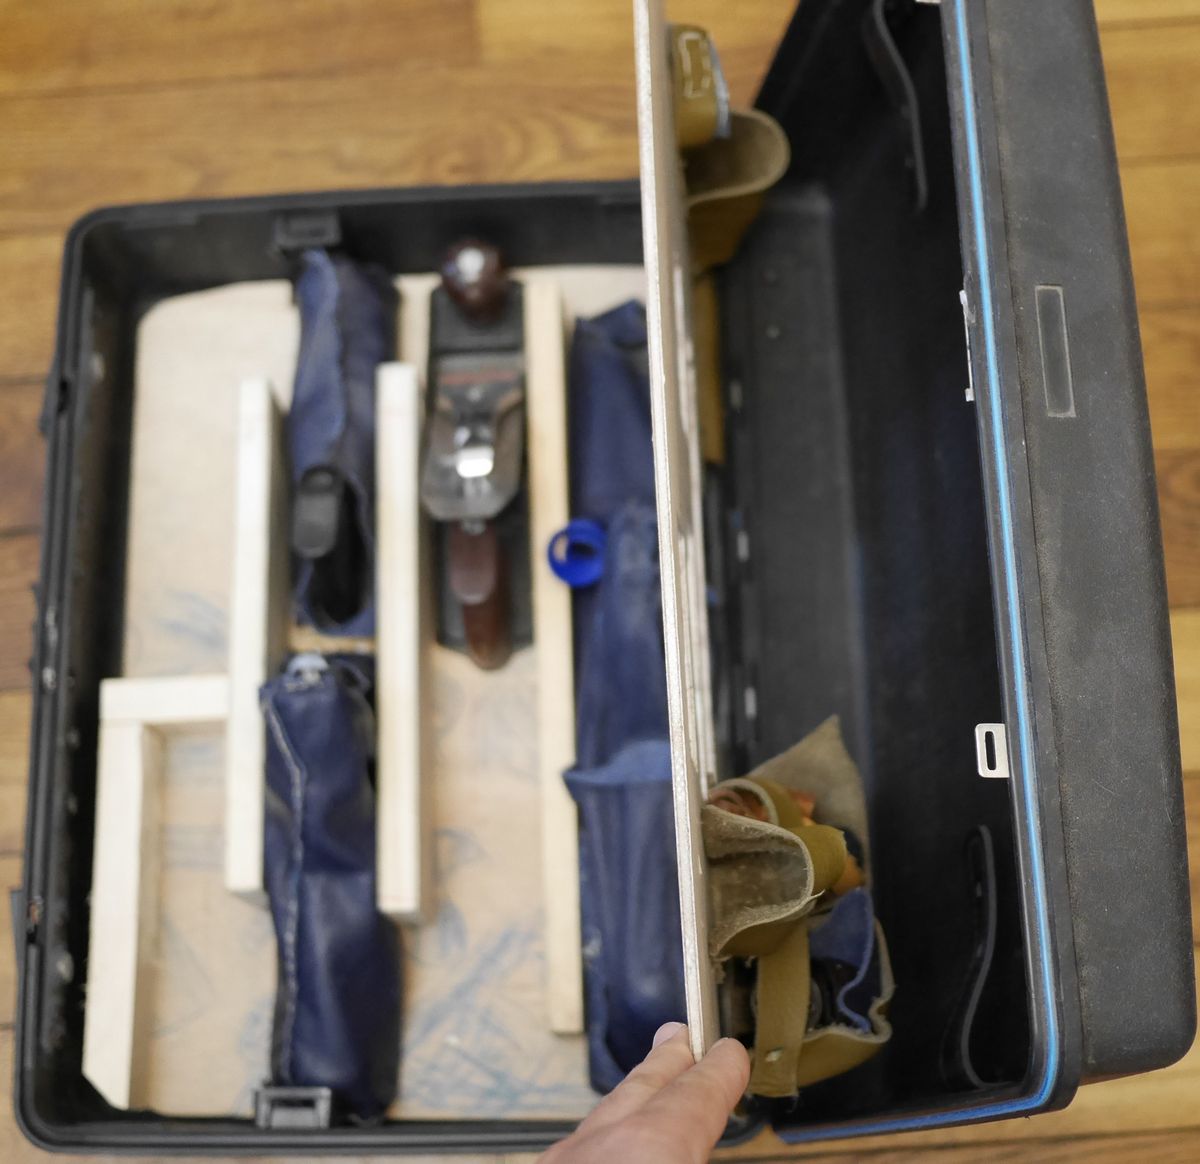
I found a rigid suitcase in a flea market, super heavy, but super sturdy.
It was latter adapted to store hand planes on two levels.
The top level is for light planes, the bottom is for heavy planes.

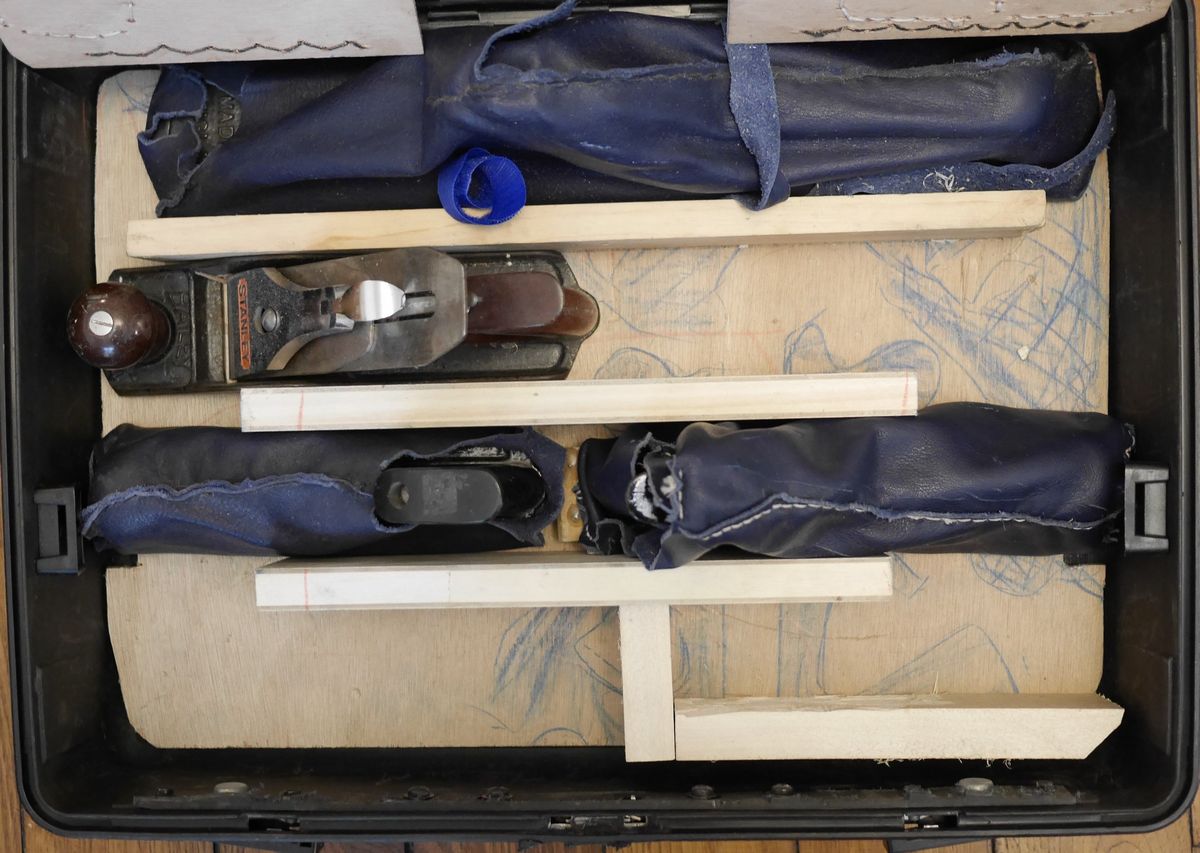
The top layer accommodates 3 low angles planes (Stanley 60 (nice but hard to set), modern folded steel(can’t be set at will), and a plane from diktum (very nice)),
plus a very small bullnose plane (Stanley 75, not good blade quality in my opinion)

The bottom layer has a Stanley n°6 (nice, heavy), two n°4 (one Stanley, one rare French Peugeot with adjustable mouth width) which have a very handy size, two n° 3.5 (Stanley Handyman and a modern version of it with two screws to adjust blade), and a Stanley n°3 sweetheart (can remove a surprising amount of wood, I use it a lot to shape curved stuff)
Overall, I can cover a lot of use case, still lacking a proper low angle plane (n°62), and a n°5 with a serrated blade. Sadly, these models are very hard to find in France flea market.
Hand saw###
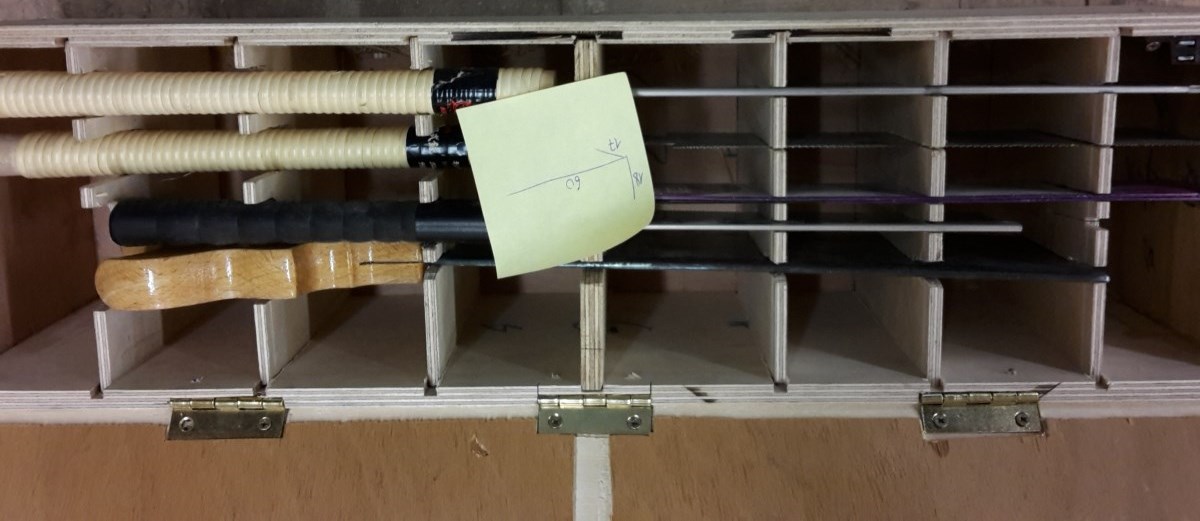
Hand saw are necessary for join work and cuts that need to be made on the spot. I use 3 Japanese saws that I found in Japan. Additionally, Peugeot made some hand saw in the 20th century. I found one that I refurbished and re-sharpened in the Japanese style, so it can cut in both direction, and is much much faster. This kind of sharpening is super long (2 bevels per teeth), but super effective. I also use a veneer saw that I sharpened similarly.

The saws are stored in a custom box with grooves tailored to each saw.
Saws are well protected, but after some time the box is bulky.
Router
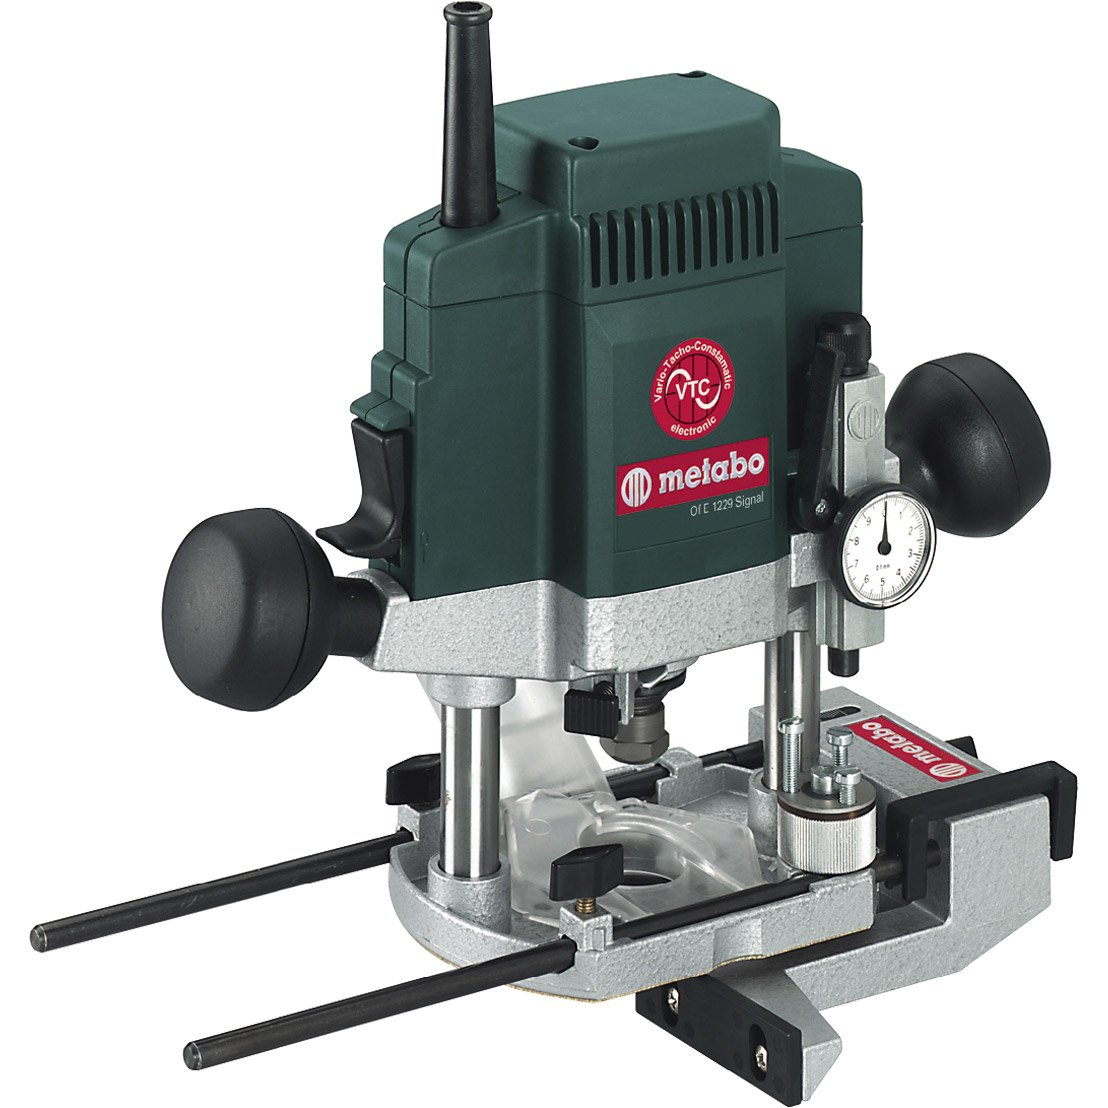
A router is a versatile tool. The model I chose is the Metabo signal, I really like its depth gauge, simply incredibly practical!
I use it mainly for some joints (mortise and tenon, rabbet), and to plane end grain wood (cutting board). I use router bits from the Italian company CMT. The most important thing is to keep these bits clean and sharp in my opinion.
Rasps and files
Rasps and files seems to be overlooked in modern woodshop. They can be used in a lots of situations in my opinion.
Raps are super quick to remove wood, even when the fiber direction would be hard to deal with a plan. I especially like hand cut raps (found in the flea market) and Japanese rasp that is made of saw blades.
Files are also necessary to maintain and sharpen tools. Some files can also be useful for finishes on super hard wood. I tried carbide files but was not convinced, so for the moment I use steel file (with various sections for sharpening, triangle or diamond shaped, and various print adapted to sharpening), and also diamond covered files.
Diamond is necessary to sharpen hardened steel.
With the files are two metal brushes. This may seems pointless or borderline maniac, but cleaned files remove wood much faster and much cleaner.
veneer equipment
The specificity of the French fine woodworking certificate is to deal with veneer. I use a straight piece of medium as a rule. I glued abrasive paper on the bottom so it does not slide when cutting. To cut I use a traditional pull/push veneer saw, specially sharpened for a better cut (inspiration from Japanese saw). The most important part of working with veneer is a special tape that is humidified and keep pieces of veneer joined.
I use a serrated plane blade to scrap the wood surface so gluing is stronger.
The traditional glue is a little bit hard to prepare but has so many advantages it is worth it anyway. It is durable, supple, tolerate well thick joins, and can be un-glued by warming. I use an animal glue made from cows: a mix of extract of bone and nerves of beef (hard to translate this one in English!)
Miscellaneous
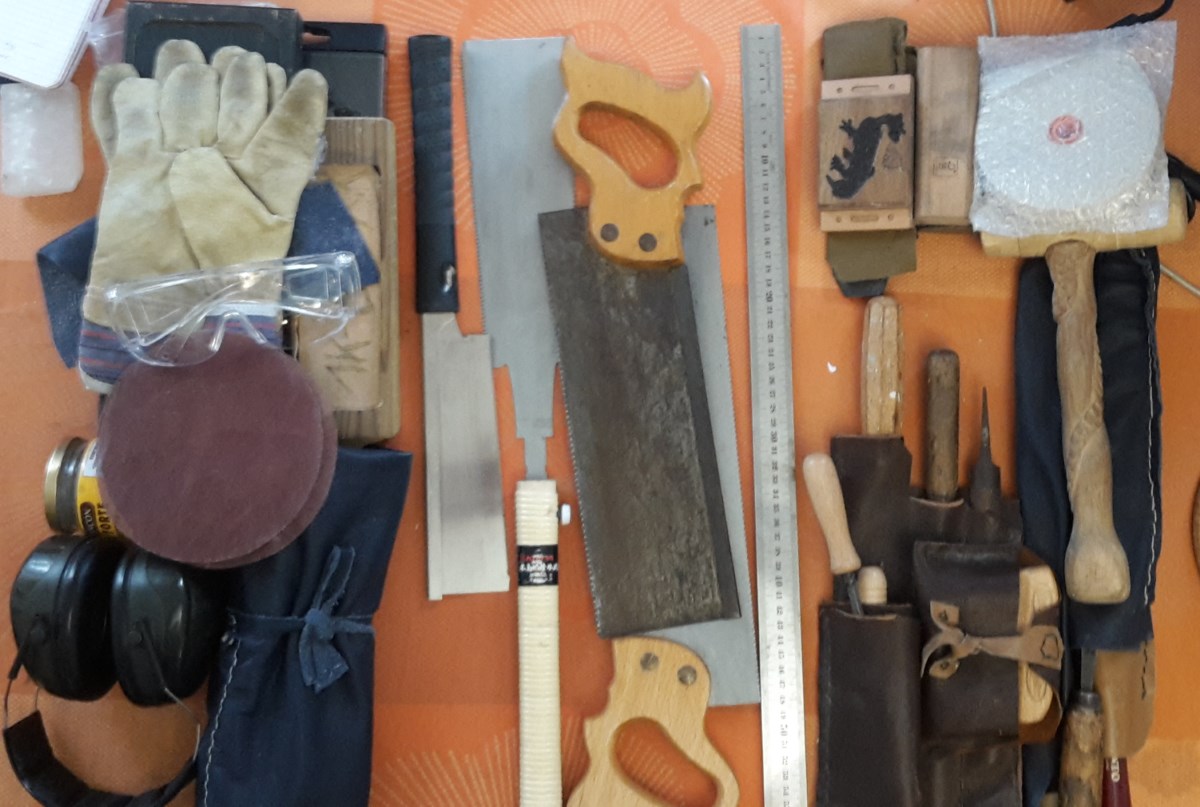 Wooden hammer, safety equipment (headphone, safety glasses, gloves), varnish, various glues …
In practice I separate between tools I always need with me and tools that I can leave in the woodshops.
Wooden hammer, safety equipment (headphone, safety glasses, gloves), varnish, various glues …
In practice I separate between tools I always need with me and tools that I can leave in the woodshops.
Sharpening equipment##
Sharpening is useful in many ways, one is that mastering sharpening allows to use tools for a long time. Most of the tools and straight razor that I sharpen are 60 to 120 years old, a nice way to keep these object alive, and avoid filling landfill with obsolete-by-design modern objects.
Sharpening is a very complete experience that is close to meditation (as you focus on your touch sense, similarly to how you may focus on breathing in some meditation methods).
There is always something to be learnt, yet I’m confident I reached a very good mastery of hand sharpening due to extensive experiences with straight razors, knifes, saw, wood chisels, plane blade, scissor, scrappers, as well as specialized leather tools.
Diamond stones###
I sharpen by hand, which is slow when a large amount of steel has to be removed.
To this end I use diamond stones (DMT).
Although expensive (especially the shipping cost to France), they cut very very fast, and stay flat.
The very coarse /coarse stone is a jack of all trades, but a very very rough would be useful in many cases.
The new DMT stone with ceramic bases are also quite convincing in my opinion.

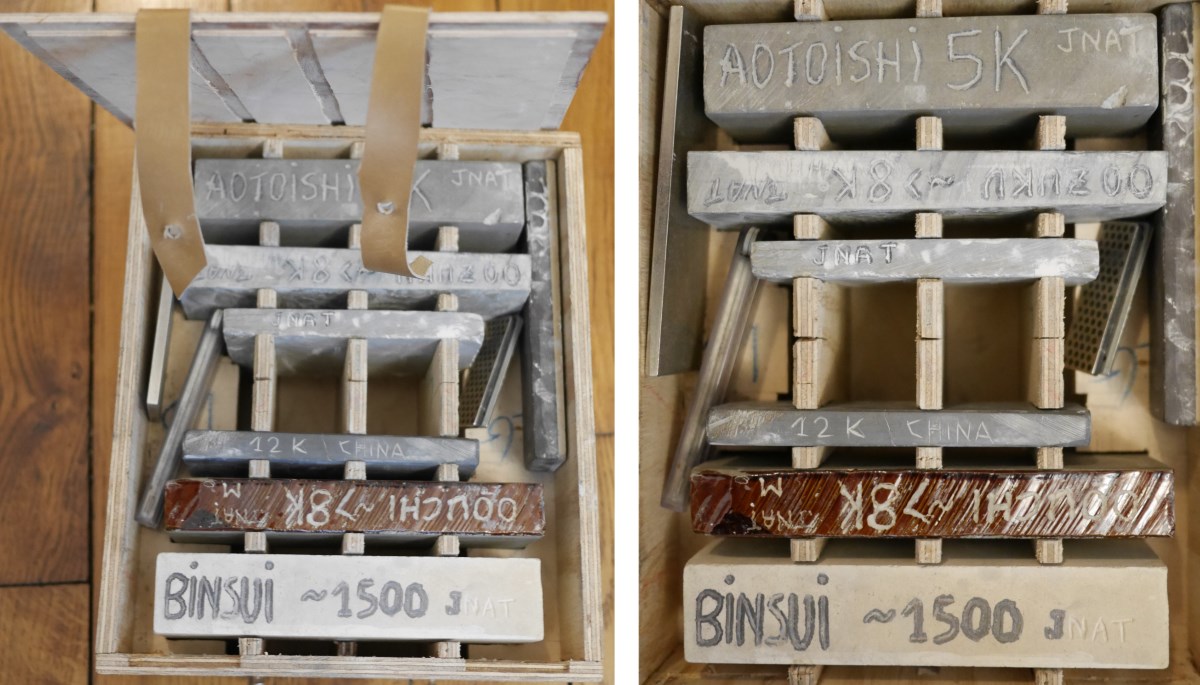
Natural stones###
My favorite stones are natural.
Most I found in Japan with sheer luck, having encountered the last owner of an active quarry in Kyoto. I rarely use the 1.5k grit one (Binsui) because it is slow. Yet I’m super found of the 5k one (Aotoishi). The two 8k are very different, one being extremely hard, the other softer (Oouchi and Oozuki). I also have two finishing stones from Japan and China.
Last, I also found a Belgium coticule in a flea market. This stone is something else as it cuts fast for a Waterstone. I’d like a bigger one, but they are rare and expensive.
I built a tailored sturdy wooden box to protect and hold the natural stones.
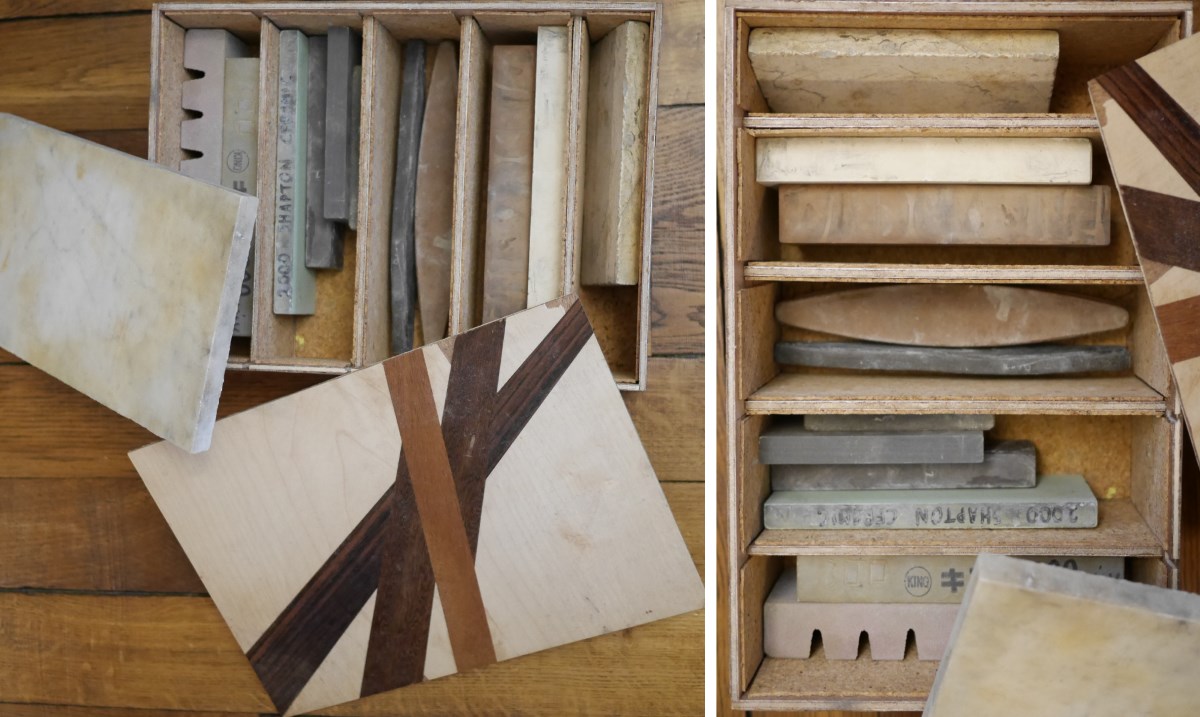
Synthetic stones###
I also build a storage box for the synthetic stones. This storage box is veneered as an exercise, and because I had scraps of veneer. The inside is lined with cork, a perfect fit for wet-stones!
The most important pieces are the two marble stones that I trued and that are used as flat references. Having a flat reference is priceless for truing planes for instance. Besides it allows to use abrasive papers to true natural stones.
Among the many stones, the Shapton 2k is especially impressive. Hard, wears slowly, yet cut fasts for a water stone.
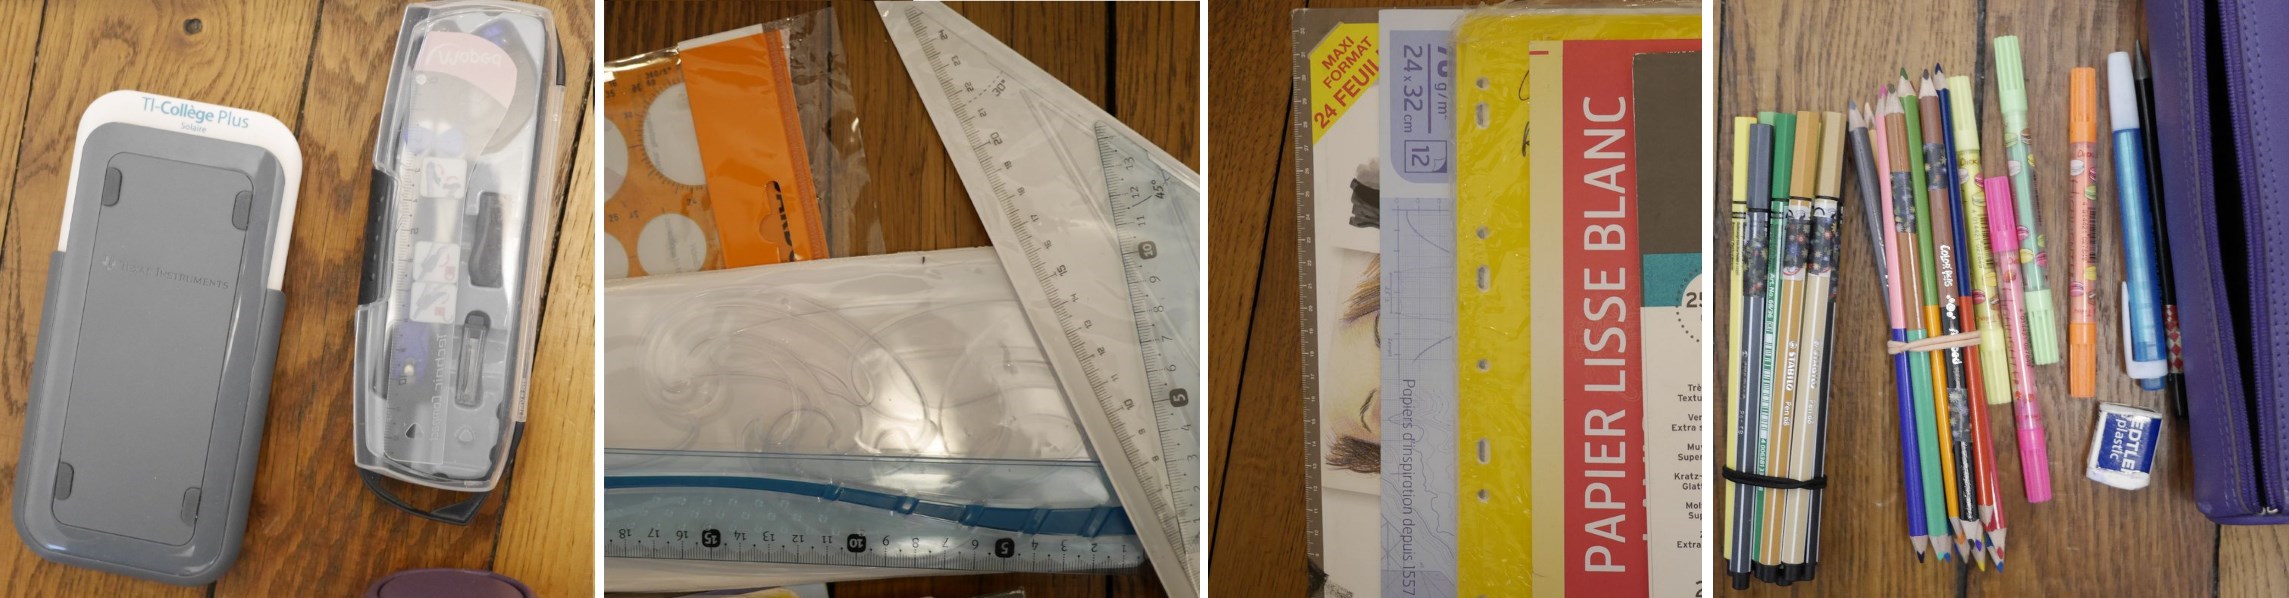
Design equipment
My design equipment is all new, essentially because of my beginner status and lack of drawing talent.
I found a case in the flea market, it was used to store professional kitchen knives (Solingen), thus it is sturdy (and ugly ).
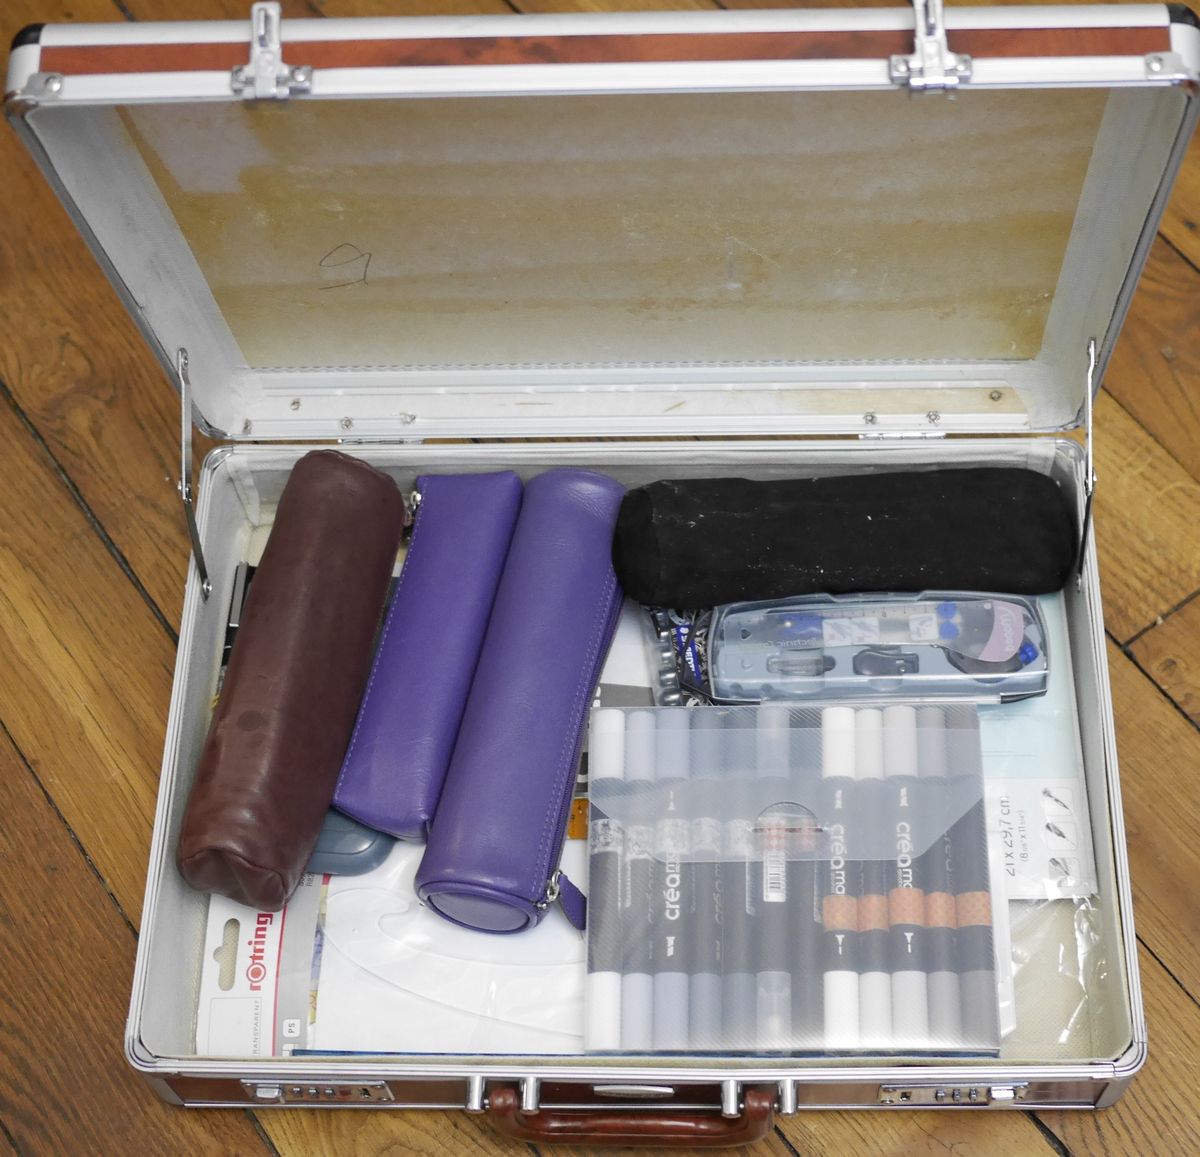
The main requirement for the exam is technical drawing. I calibrated felt-tip pen.
I commonly use 0.8 (title), 0.5 (subtitle, important stuff), 0.3 (base) and 0.1 (measure, textures, details) mm tips.
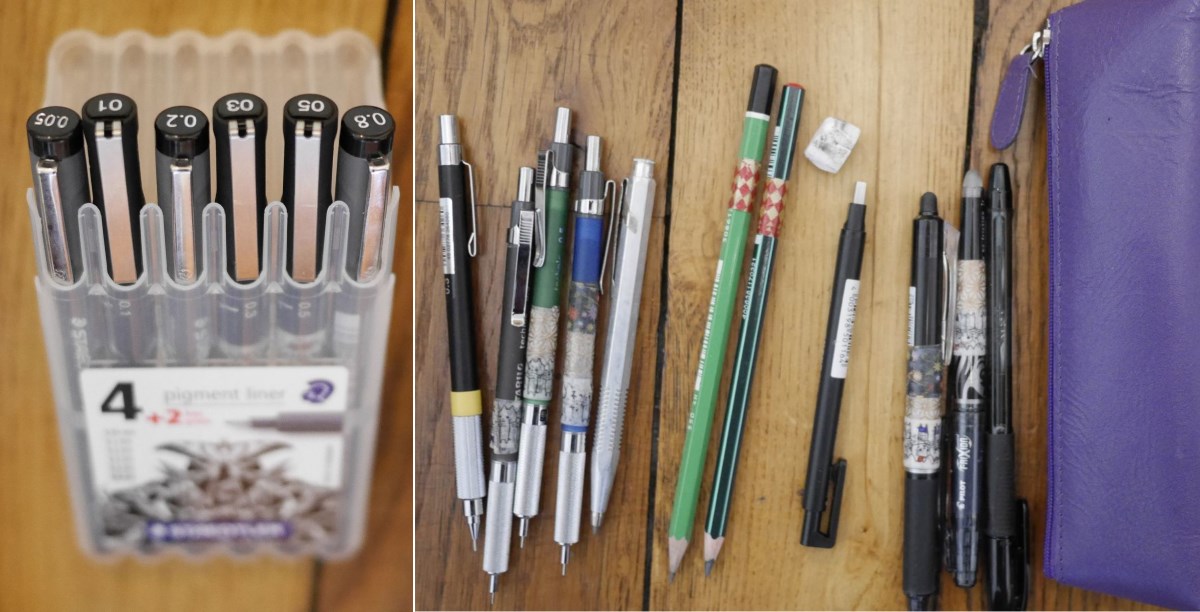
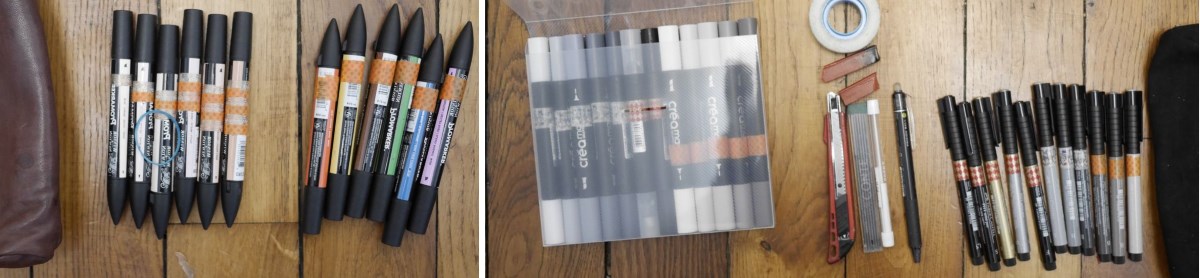
For the creative part of the design, alcohol-based pens are very useful, especially the scale of grey ones.
I latter added some with brown tone shading specifically for wood representation,
and the primary color one for general schematics. Only problem is that the ink will go through most of papers types.
Per the exam rules, a calculator is required, as well as a set of rules and squares.
I added some basic forms templates (circles, curves), which is useful when designing at the 1:1 scale.