Concept
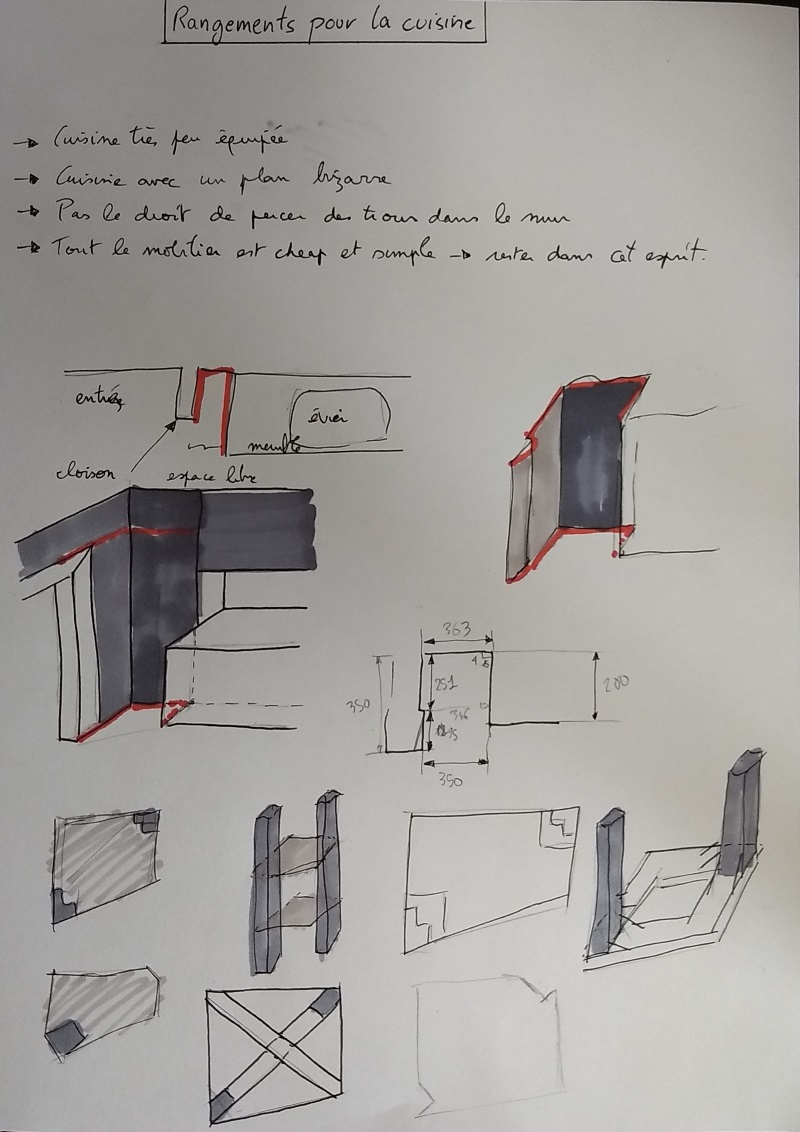
 I live in an old apartment. The kitchen was oddly designed and is hardly functional.
The goal was then to take advantage of odd available space, with the additional constraint that I’m not allowed to fix anything to the walls.
These constraints force the design to be a standalone.
Because the space available is very small, I decided to try a design with only two supporting pillars.
Last, I also decided to experiment with using only friction to hold the joins together.
No screw, nails, pins, or glue.
I live in an old apartment. The kitchen was oddly designed and is hardly functional.
The goal was then to take advantage of odd available space, with the additional constraint that I’m not allowed to fix anything to the walls.
These constraints force the design to be a standalone.
Because the space available is very small, I decided to try a design with only two supporting pillars.
Last, I also decided to experiment with using only friction to hold the joins together.
No screw, nails, pins, or glue.
Design
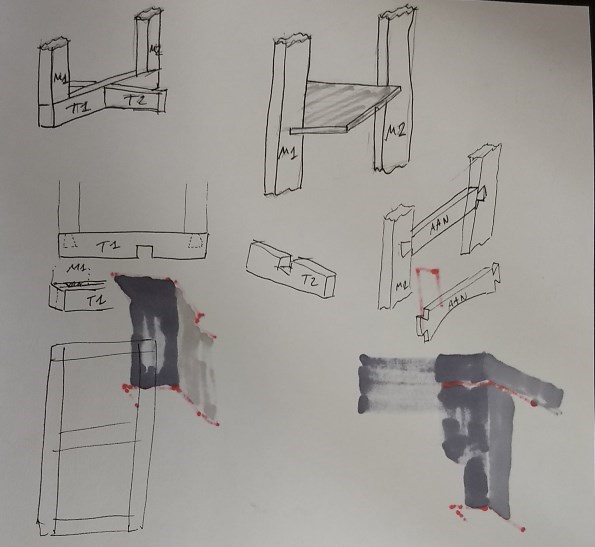
Because of the strong design constraints, joins were to be considered carefully. I opted ot build a frame using 2x4 and half-wood dovetails. With tight joins, this turned out to be rigid enough. The base of the shelve used a very basic half-wood join. Given the orientation of the wood there, the 4 inches join was also sufficiently robust to be rigid. Last the trays inserts in grooves in the frame. Here again the large contact surface ensure rigidity.
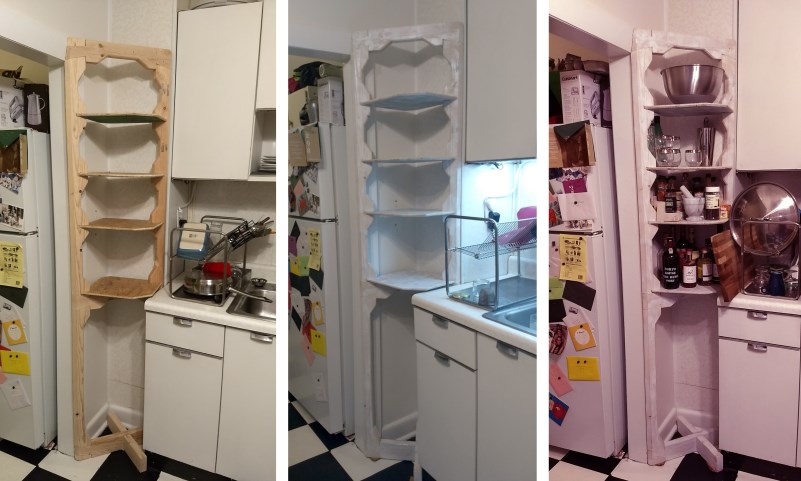
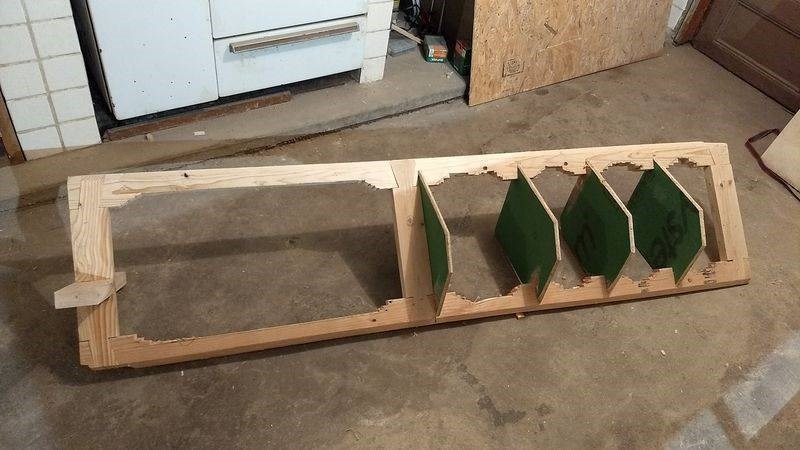
The down side of using such massive wood section (2x4) is that the furniture looks very massive. To reduce this effect, I added cutouts where possible. A small chamfer also helped in this regard, although in retrospect I could have gone much further. Last, I very inhomogeneous white paint reduced the visual impact of the shelves and kept with the slightly beaten style of the kitchen.
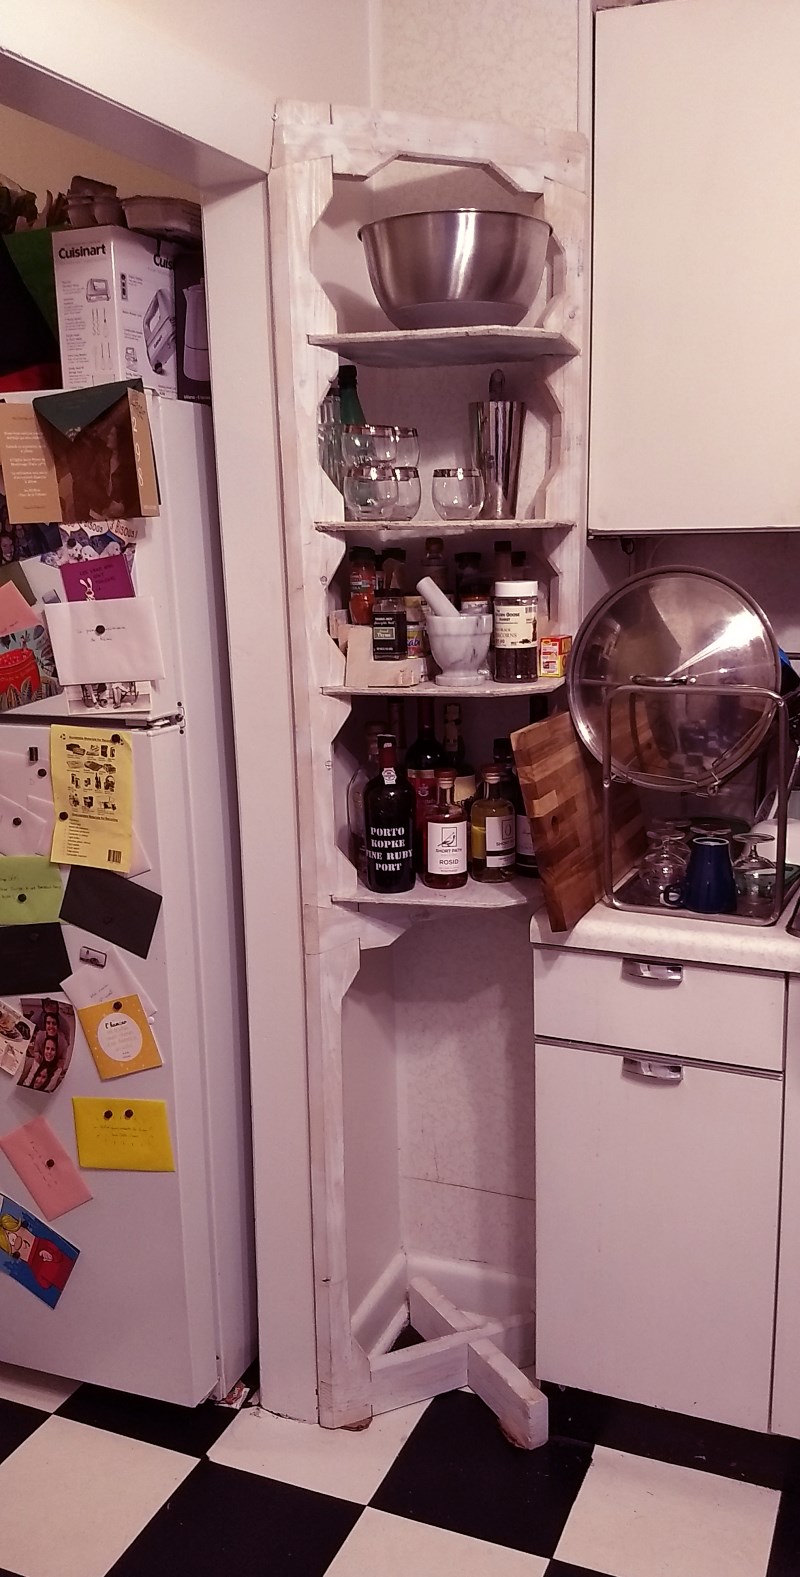
In the end, the final product fits very well into the kitchen, most people don’t notice it and think it was an original part of kitchen.
Building the shelve
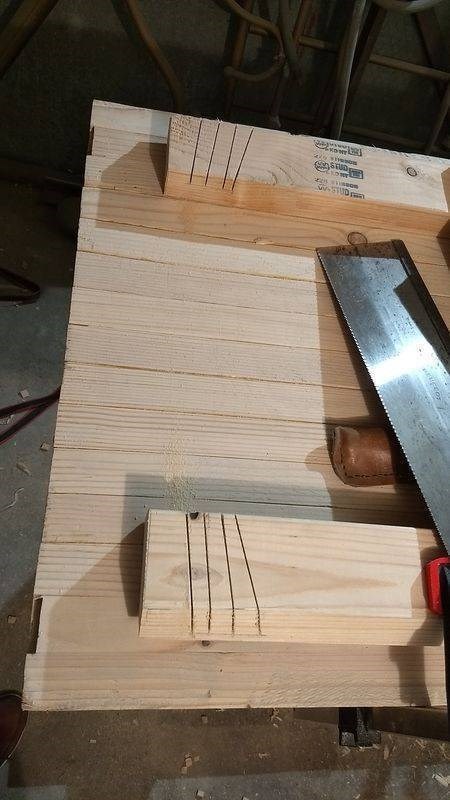
The shelve was fully build using hand tools. The wood working is rather straight forward. The main difficulty is to have strictly tight joins, as no gluing will compensate slight imperfections. Working with 2x4, joins can be made over-tight by about half a millimeter, then forced into position, thus forming the soft wood into place.
The build starts with the dovetail for the frame. It is preferable to do first the top and bottom frame, then add the middle and keep it slightly to short (maybe 1 mm), so to introduce additional tension into the frame.
The bottom part can then be added. The join has to be tight, it is a matter of safety.
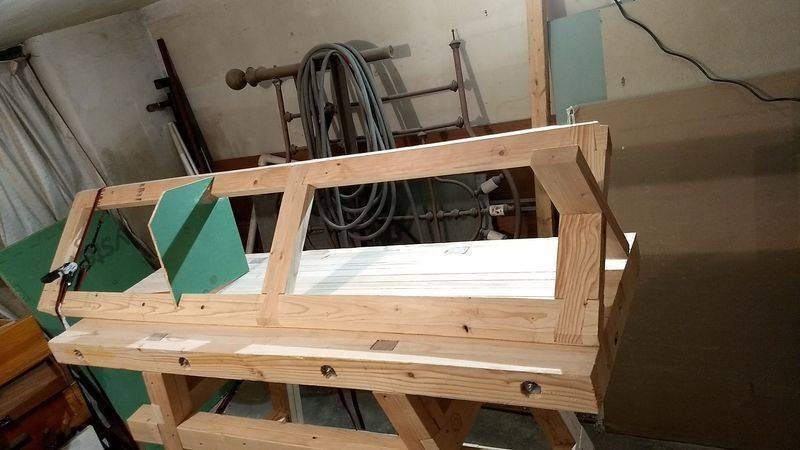
Shelves slots can then be added one by one. Take special care of the sliding direction.
Ideally, we want to maximize the surface contact between shelves and frame.
In practice, the shelves are very stable and can be loaded no problem.
result
The finished shelf add to be slightly carved to fit to the exact (not-straight) wall. Overall, the result is very stable.